
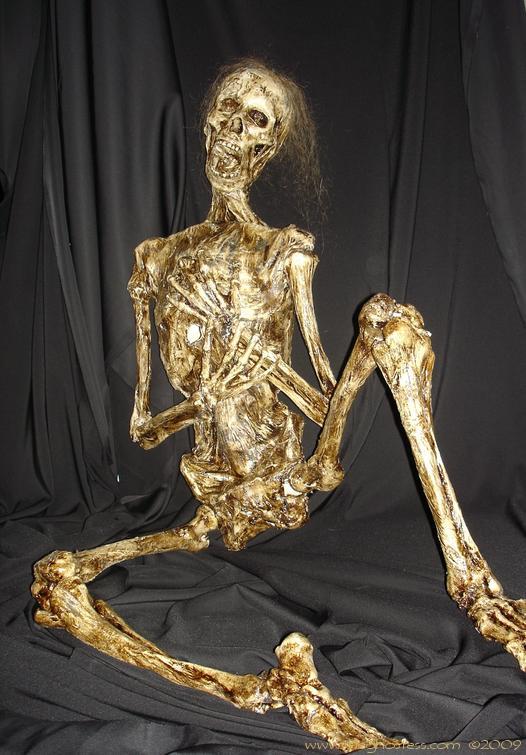
I wasn't going to do a page on it, but I had a
enough requests for a how-to on the Bucky corpse I did, so here's the basic
run-down of it. I didn't take many pictures since there's already so many
corpsing tutorials out there. Click on the pictures for a larger
view.
Materials used:
1/4 gallon Cementex L-200 Casting Latex
paper towels
tissues
Skeleton
2 long screws
MinWax stains in Jacobean and Ipswich Pine
metal handled hobby brushes (or any small paintbrush)
rubber gloves for staining
old rag for staining
small paint brush or craft sponge for staining
some hair and glue (optional)
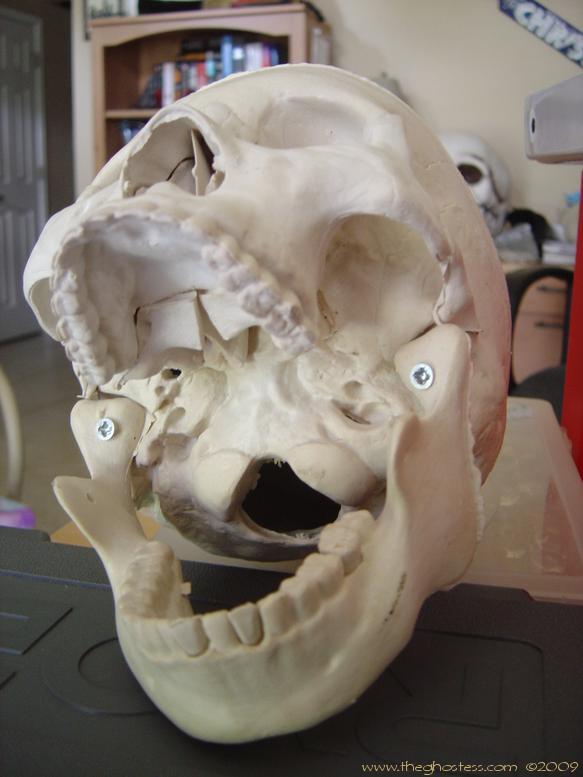
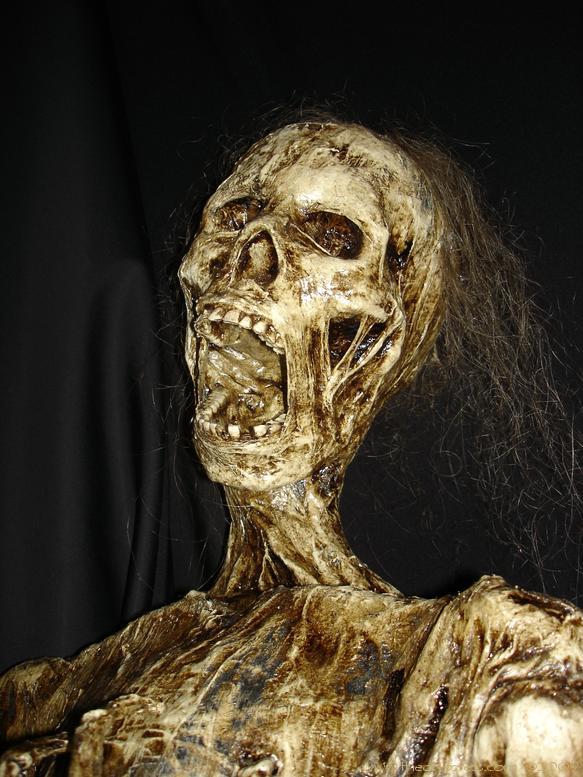
I started by taking the hardware off of Bucky's skull. I used a couple of screws
to hold the jaw in the wide open position, then I took a heat gun to the lower
jaw and softened it so that I could pull it forward some so it wasn't open TOO
wide.
I gave Bucky a base coat of latex on the area I was working on, just to make
sure I had good adhesion. I took a paper towel (split it to make it one-ply) and
dipped it in the latex, then squeezed the excess off and draped it over the
skeleton. I did this in most of the large areas like the rib cage, pelvis, neck,
etc. This was the basic foundation for the more fragile tissue to go on top of.
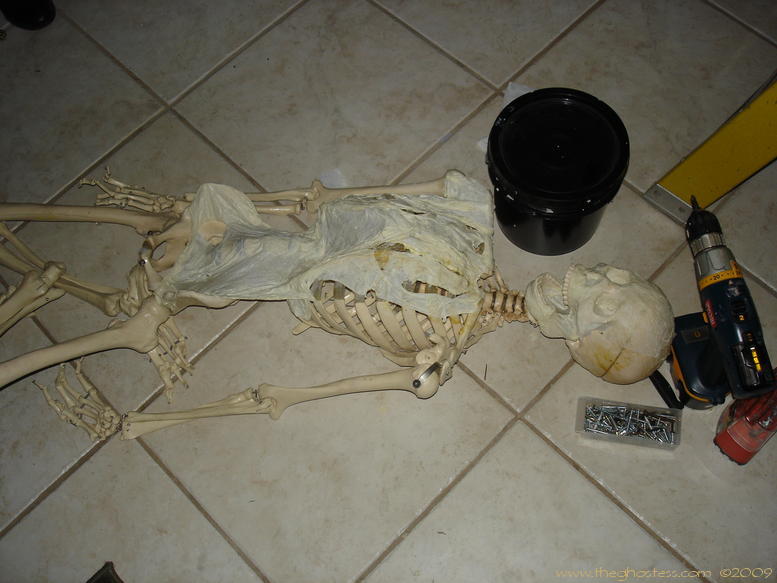
I used the paper towels to do the inside of the mouth and jaw and the eye
sockets as well. Once the paper towel parts were dry, I worked on getting the
hands and feet ready. I used hot glue to position all of the fingers and toes in
the right way since they were all out of whack. I also snipped the little spring
off of the section between the thumb and index finger. Since I'm corpsing over
that, I don't need it there to hold it in place. I just kind of shot glue in
between each joint.
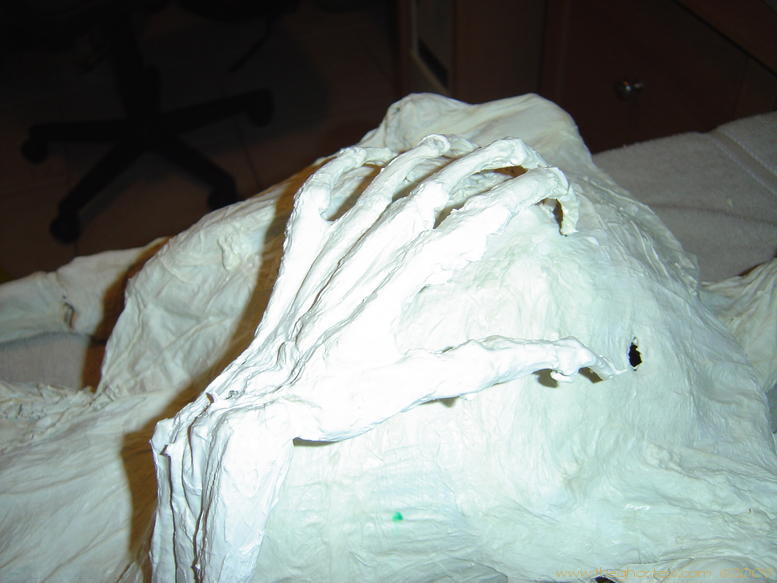
Then I started to brush latex onto the areas I was working on, then place a
strip of one-ply tissue on it, then brush more latex over that. How it will look
depends on how hard you brush it, how much latex you use, and whether you just
kind of push it around 'til it looks good. The best thing about corpsing is that
it does not have to be perfect. I left some holes here and there, some exposed
bone. It's all about personal preference for that stuff.
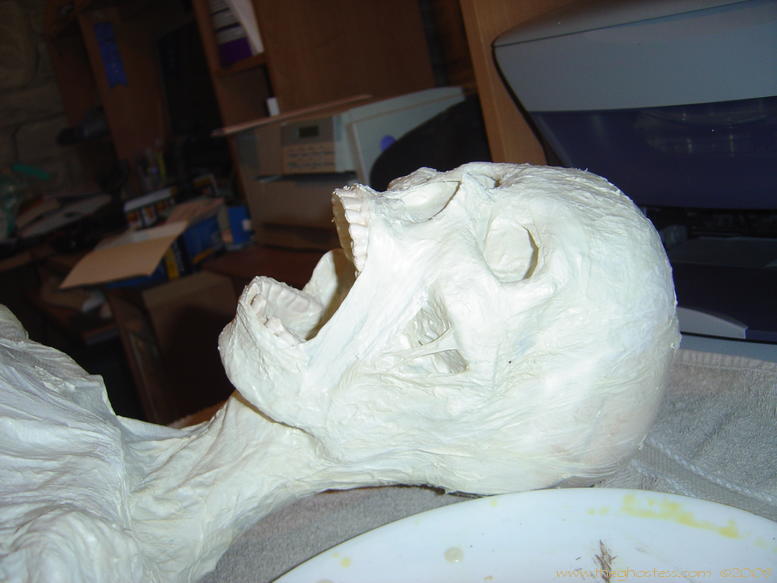
I wanted a different look for the face area, so I kind of rolled some tissue
into a strip and dipped it into the latex, then draped it across the cheek bone
down to the jaw. I also gave a small hint of remaining eyelids using small
rolled strips of dipped tissue.

I gave the entire thing a last brushing of latex to make sure I didn't miss any
spots and to smooth it out some. To finish it up, I used some Jacobean stain and
brushed it on, wiped off immediately leaving a nice aged look. Of course, one of
my son's friends said it was too "brown", so I went over that with the Pine
stain and that kind of removed some of the darker color and made it look better.
Last step was to glue some hair on. I cleaned my hairbrush and used the
escapees. I just hot glued it on. A little here, a little there. Regular old
Elmer's glue would work too. That's really about it.
I've also had questions on the difference between using the "fresh" latex and
the expired stuff... The major differences are that the fresh dries white. The
expired dries an amberish clear. I've used the expired as glue for hair and
eyebrows and for a final outer coating on my latex heads. Can't do that with the
fresh stuff unless you want to paint again. Also, the fresh stuff is much
thinner. Think MILK. The expired is more like a thin yogurt. The expired also
smells more of ammonia.
![]()
![]()
All information contained on this website www.theghostess.com is provided for FREE, is intended for entertainment purposes and general sharing, and may not be reproduced without express permission from the website owner. If you have been sold information regarding or taken from this website, please contact the admin at the link in the navigation menu. Copyright 1999-2015, The Dead End.