
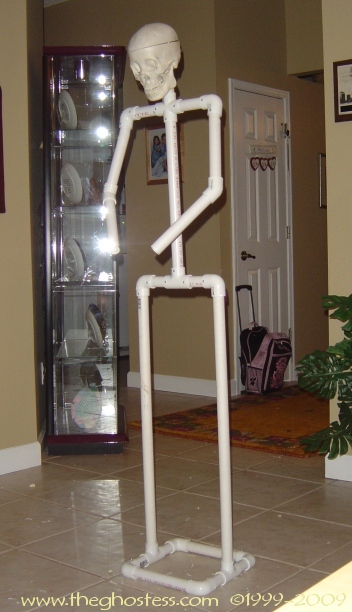
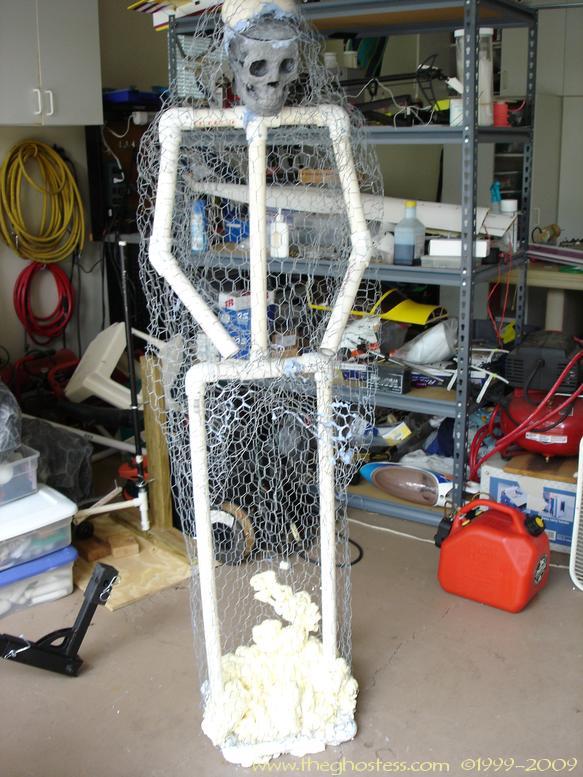
This is my second monster mud project . I call him Grim. He's a monster mud reaper, about 5'5" tall. I used a schedule 40 1- inch PVC frame and chicken wire to build him.
(Click on the pictures for a larger view)

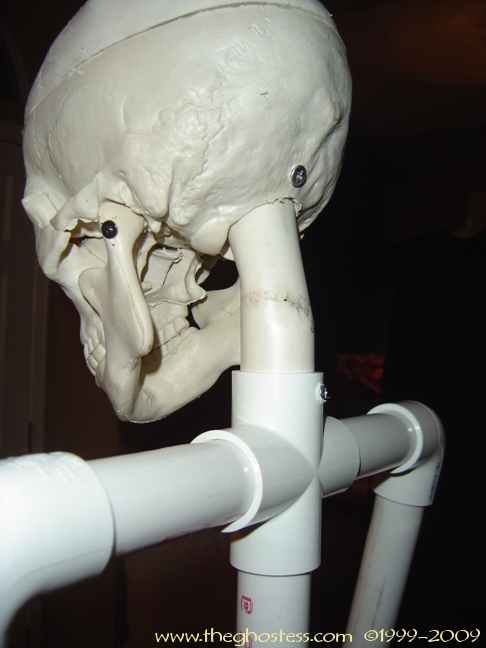
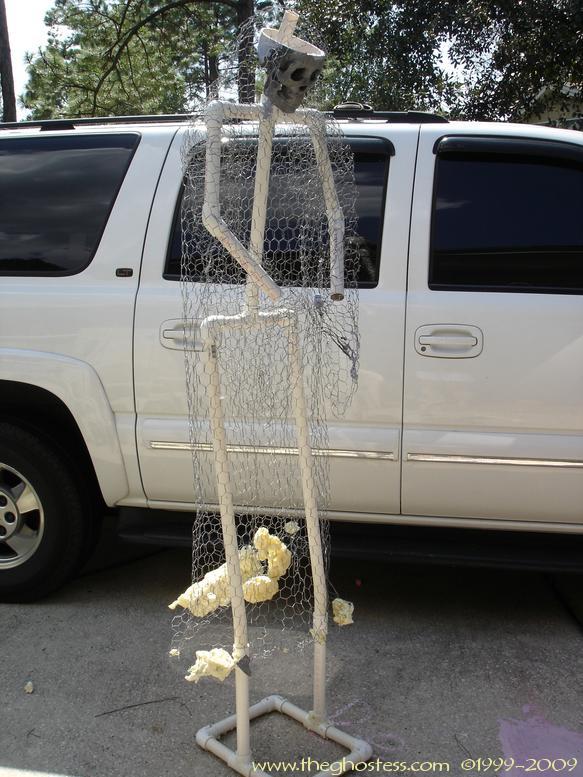
I used a heat gun to bend the neck some, making him look down a little. I also screwed the jaw together and the skull to the PVC.
I gave him a spine, arms, and neck and drilled the hole out a bit more in a bucky's skull to fit over the PVC.
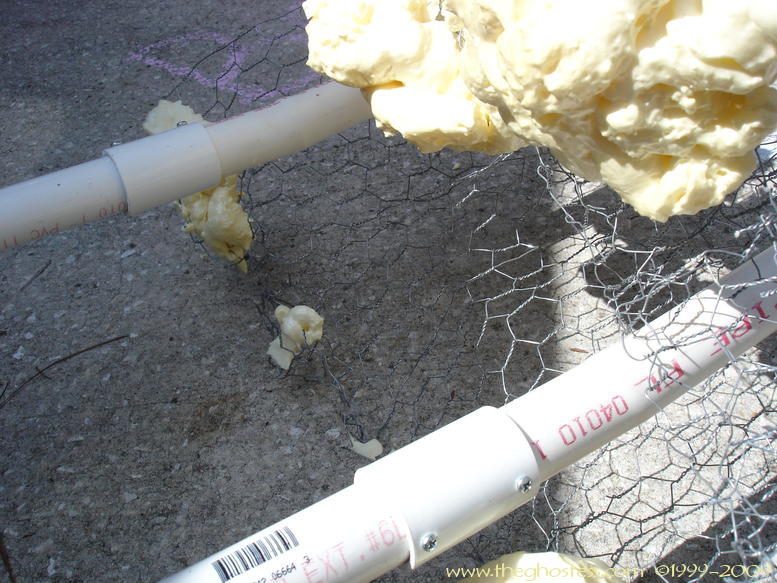
I started with a square base using 90 degree fittings and then built up with legs to the hip section, making sure everything was square and level.
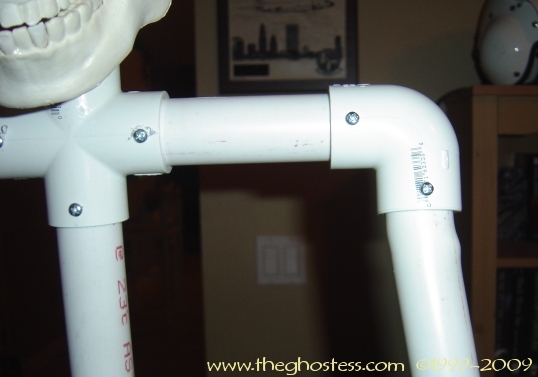
I also used the heat gun to bend the arms some. The 90 degree fitting was not letting the arm go outward enough, and the 45 degree one was TOO far.
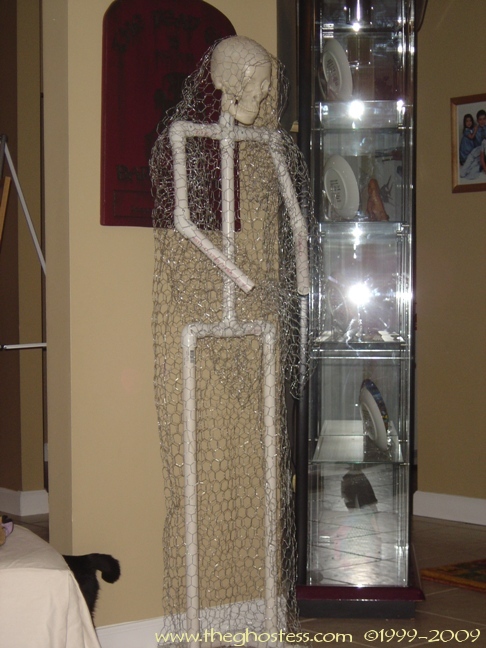
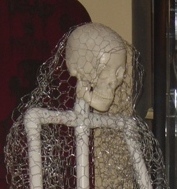
I added the chicken wire frame around the PVC into the basic shape that I wanted him to be in.
I didn't take any pictures of the placement of the sheets... so I went back and just took a couple of pics of how I attached the pieces of sheets. I cut a piece for the hood section that fit over the hood and inside the chicken wire behind the skull. Then I cut a long piece for the back and attached it up under the hood piece. I cut a piece for the front of the robe and attached it behind the sleeve section of chicken wire. Then I cut a smaller piece for the chest area, securing it under the hood and behind the sleeves of the chicken wire. I cut 2 long pieces for the sleeves, attaching then under the hood at the shoulder and wrapping them around the sleeve, securing them between the sleeve and body of the reaper. Last, I tucked the sheets up inside the sleeve of chicken wire.
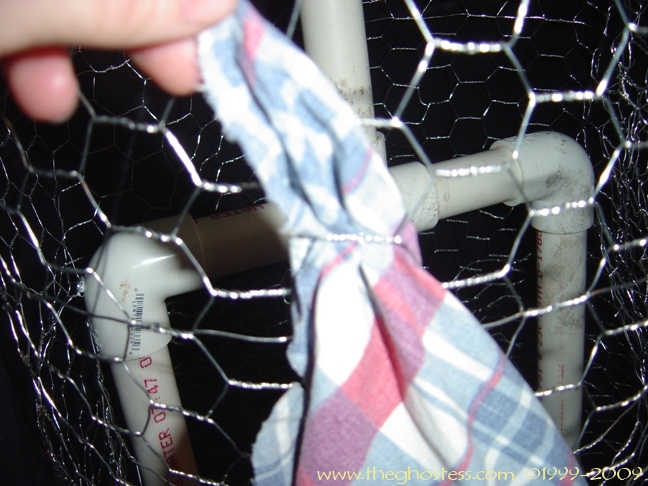
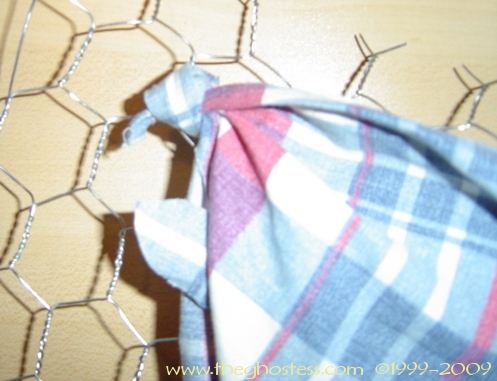
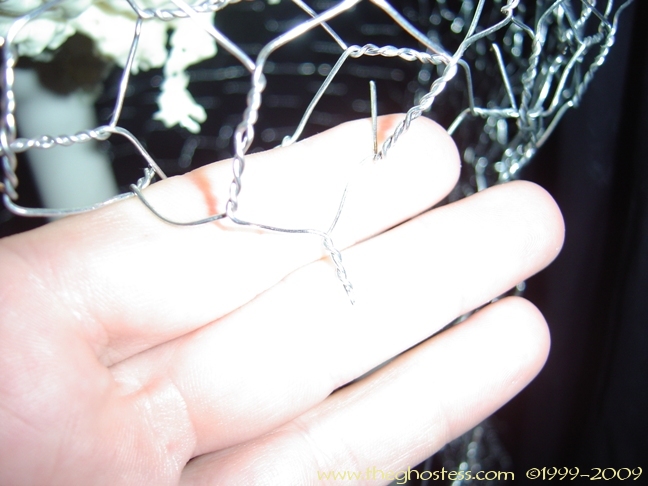
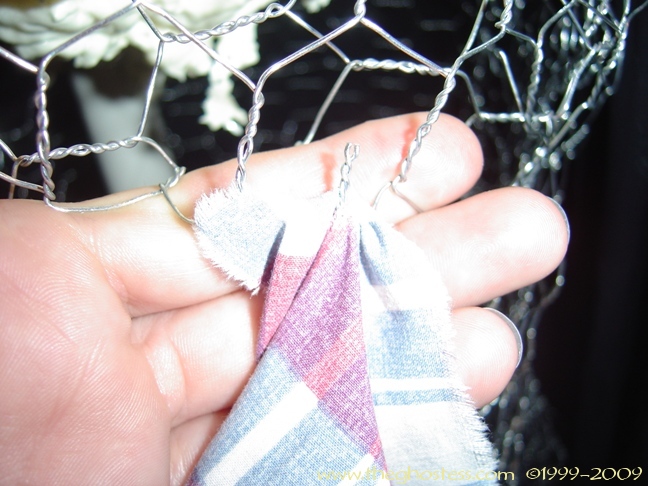
In the spots where there were these pieces of chicken wire sticking out, I just poked the wire through the fabric and then bent the wire over to hold it.
Then I tied it in a knot around the wire. TOO simple!
I pulled the sheet through the chicken wire.

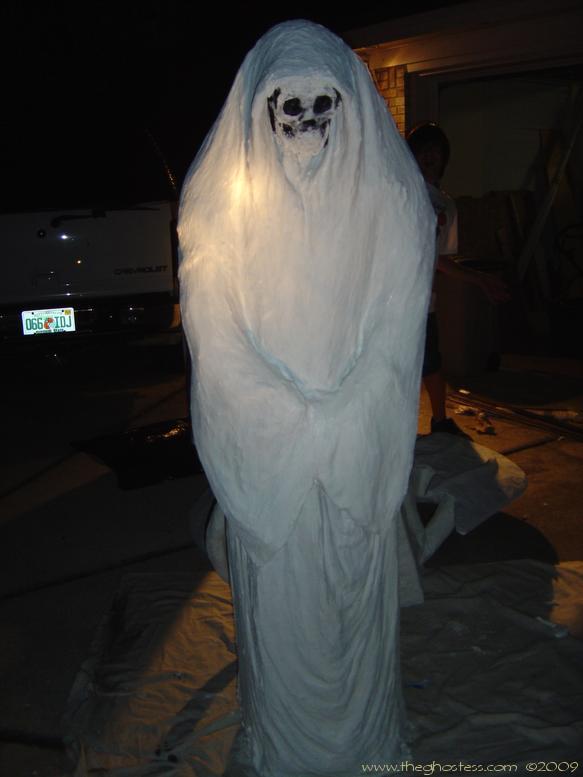
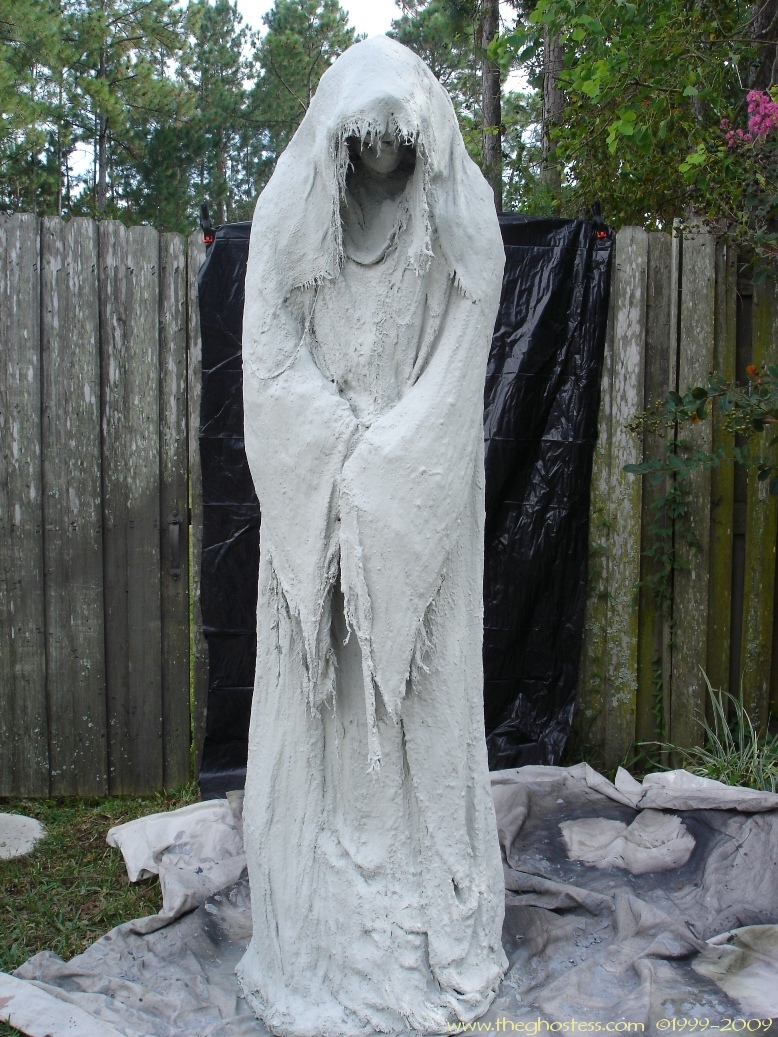
Now Grim is waiting to dry. With the humdity here with that dang hurricane out in the Gulf now, it may take a while. I used Navy blue exterior paint in my monster mud mixture that I bought to paint my front door and shutters... it turned out a nice baby blue on Grim. :)
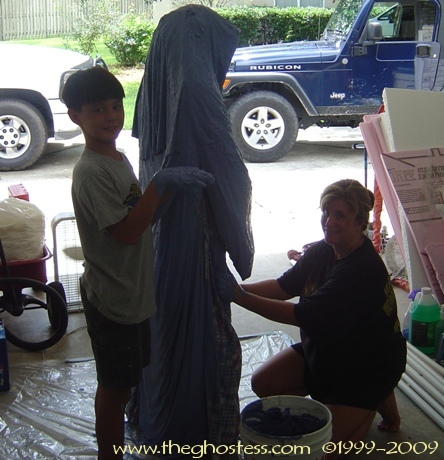
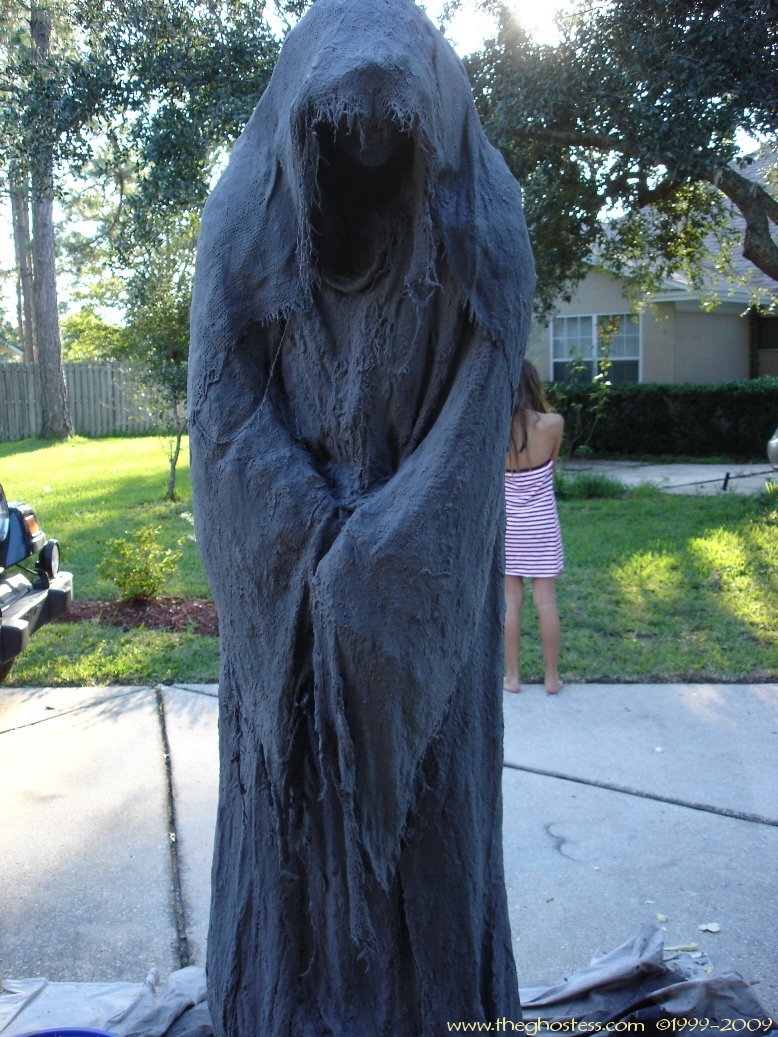
My son and I gave Grim a nice slathering of monster mud. I forgot to take pics of him before the mud, where he only had on a Ralph Lauren sheet set. I hated those sheets, my ex picked them out...lol
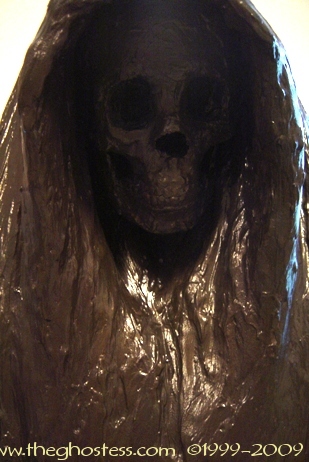
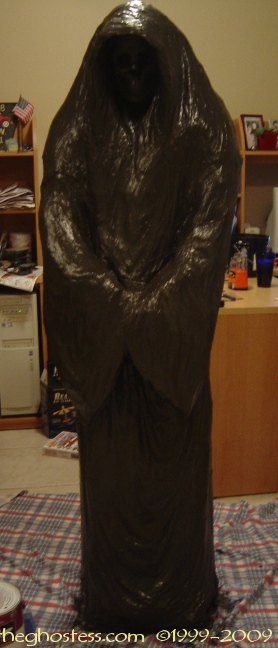
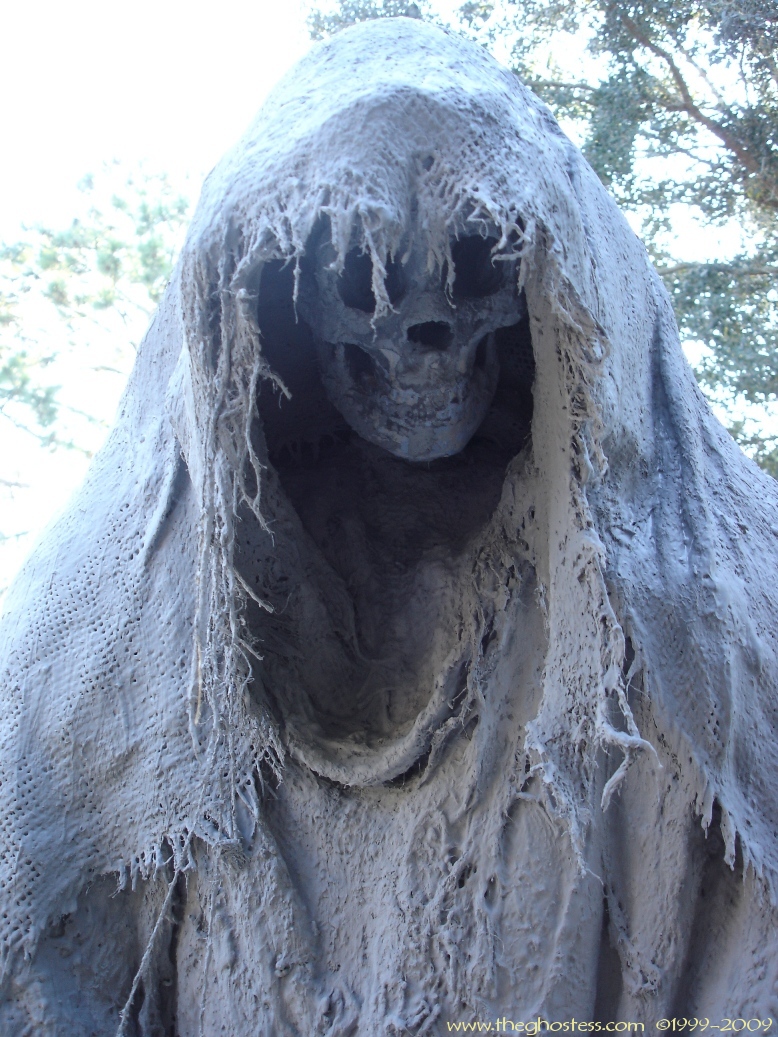
In the end, I ended up giving Grim 4 coats of monster mud and 4 coats of paint. I wanted to make sure he'd be solid for a long time to come. I think if I were to take out the PVC frame underneath, he's stand without it or the chicken wire! After I base coated him, I took a damp kitchen sponge and some light gray paint and just kind of ran the sponge downward in swift short strokes. The paint job didn't turn out like what was in my mind, but it'll work.
I gave Grim a makeover in 2007.
Poor Grim took a beating before Halloween. I repainted him and everything, giving him a double coat of DryLok and a nice new better paint job. Then the next day, he fell over and cracked in several places. Then he fell over a few more times. I just left him on the ground after a while. It was just too windy. I'll just have to rebuild him. Only better. Stronger.
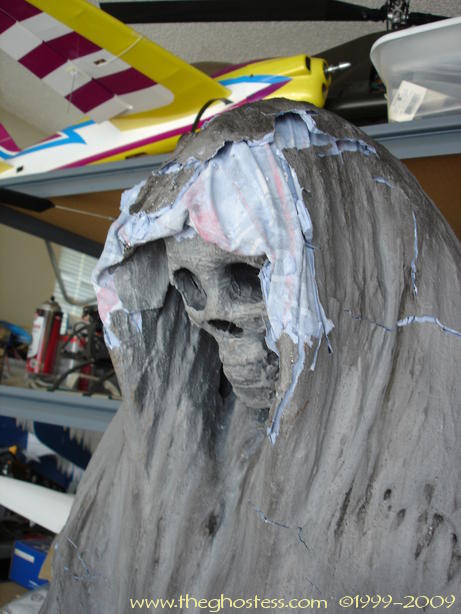
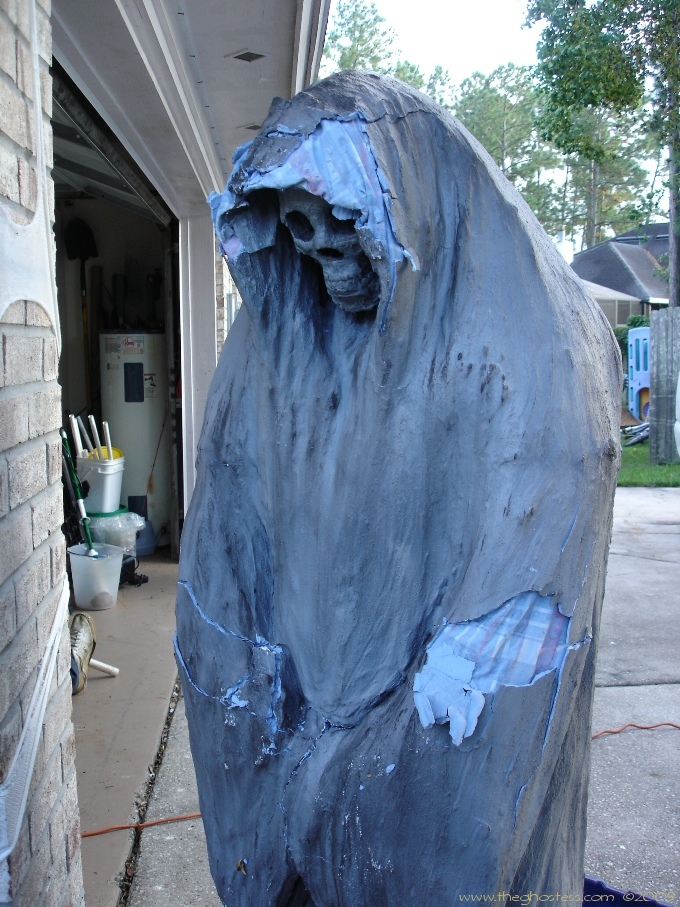
In 2008, Grim finally got his makeover. He also grew over a foot and got a more stable base. I started by stripping all the old mud and sheet. Then I cut the base off and added more PVC to the length of the "legs" of the frame.

I used a heat gun and bent the PVC about where the knee would be to cause the whole frame to lean back a bit so it didn't topple over like the previous version. It kind of balanced out the whole frame.

The I added more chicken wire to the bottom to cover the new frame section. One I got it all covered, I started to mud it! I used burlap this time instead of sheets. The burlap holds the mud better and the dried mud doesn't peel or cake off. It took two coats of MM to fill it in right.

I chose a much lighter color of gray this go 'round. I used the paint sprayer to paint him, which made it MUCH faster. I got 3 coats of paint on in just a few hours. The next day, I added some aging, using some black latex paint and a spray bottle of water to create streaks down the mud.

![]()
![]()
All information contained on this website www.theghostess.com is provided for FREE, is intended for entertainment purposes and general sharing, and may not be reproduced without express permission from the website owner. If you have been sold information regarding or taken from this website, please contact the admin at the link in the navigation menu. Copyright 1999-2022, The Dead End.