I finally decided it is time to make a new Goliath this year since I have plenty of spare time with no party happening. I started this project technically on October 2, 2020 - with the top half of the duct tape dummy. I did the bottom half on October 8.
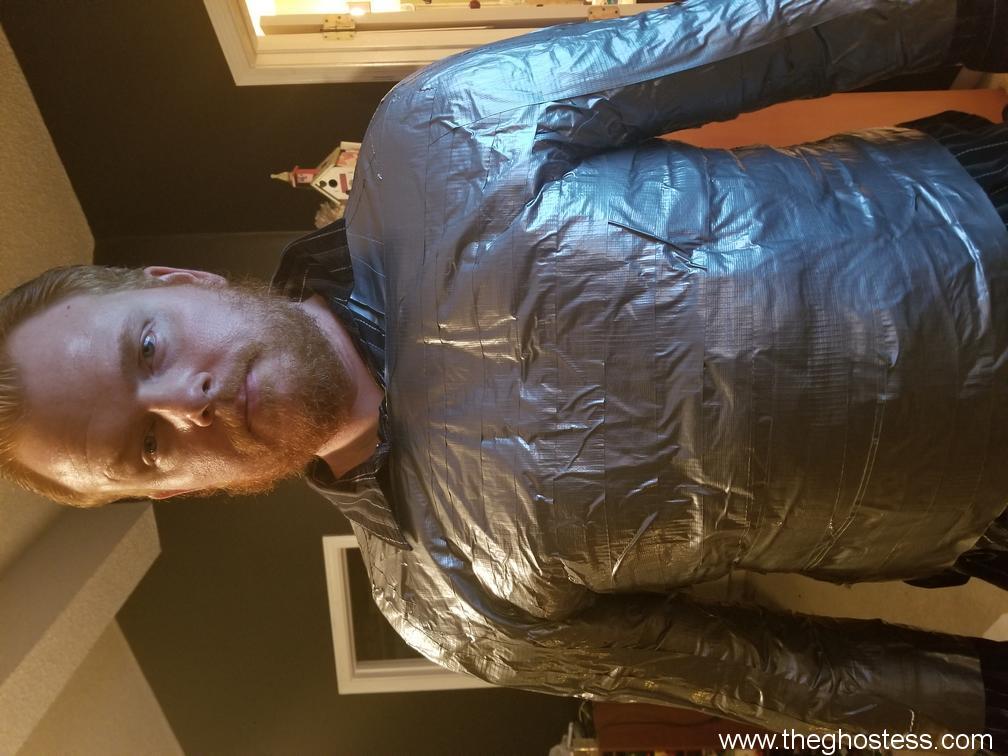
My husband volunteered to be my "model" for the size part since he is a big dude at 6'3".
The original tutorial I have always used, for the most part, can be found here: Leanna's Duct Tape Double Studio
I started out by making him put on some old long clothes that he doesn't wear any more and wrapping him in duct tape! ( His mom told me to tape his mouth while I was at it!) I did 2 layers of tape, with 3 layers or more on areas with bends such as shoulders. The duct tape dummy (or double, if you prefer) has to then be cut off. This had to be done VERY carefully so that I didn't cut the person who so graciously let me wrap him in duct tape, which is very uncomfortable and hot. Once I got the duct tape double (DTD) off of him, I grilled him a nice ribeye steak and fixed him a delicious tequila sunrise. (This part is optional, depending on who you get to help you out by letting you torture them.)
The next day (October 9), I took measurements of his skeleton. He refused to take his epidermis off for this, so I had to sort of feel him up for where his joints were. I think he kind of enjoyed it. I measured the main bones that I knew I would need to cut PVC for, both arm sections, shoulders, spine, hips, legs - you get the idea. (You can see I still have the pen my daughter made for me in elementary school that was the inspiration for my Daisy project many moons ago.)
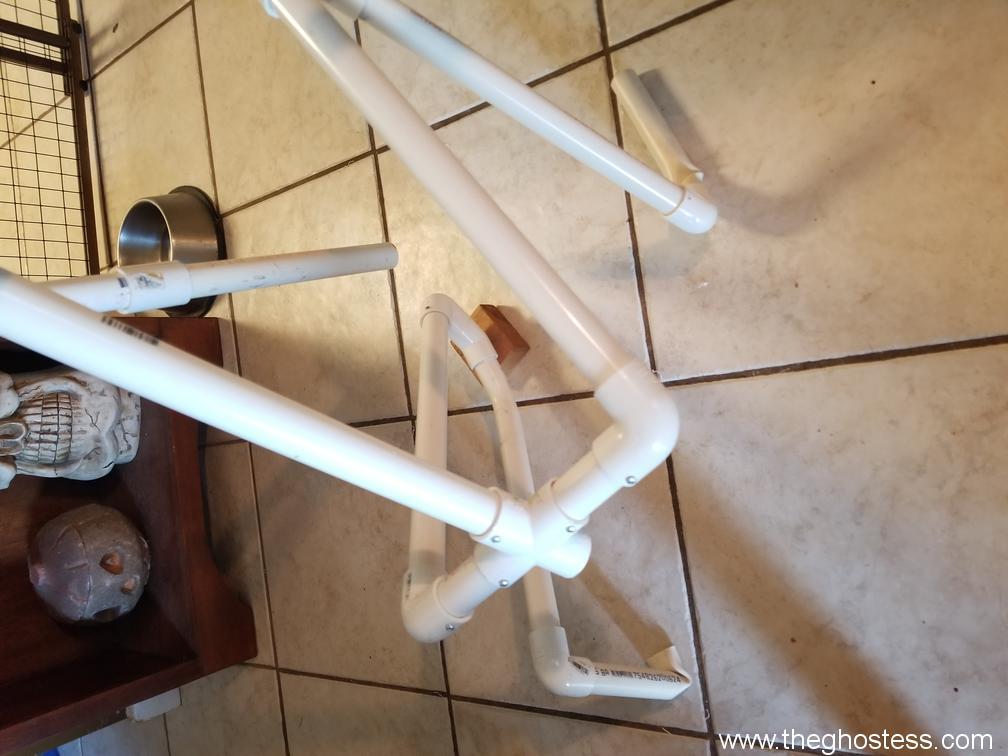
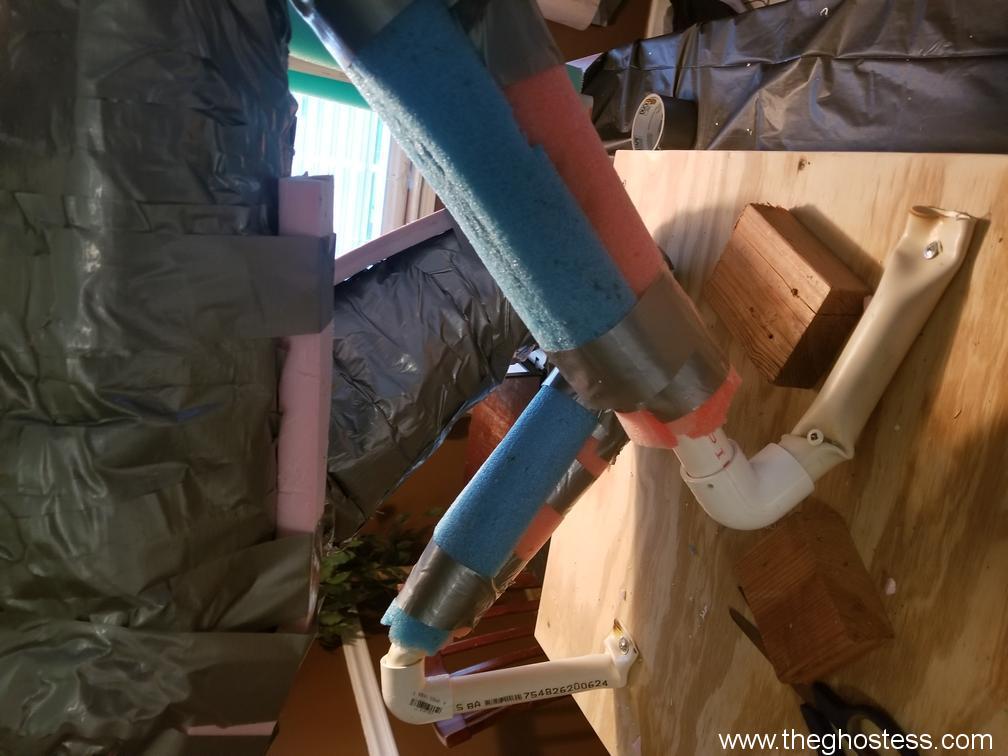
I cut the PVC sections for the frame and assembled it for a dry fit to see how the dimesions looked with my really bad calculations. They weren't too bad, I don't think... It doesn't really matter as long as the frame fits into the DTD which will be filled in with whatever foam things I have around the garage and bulked up.

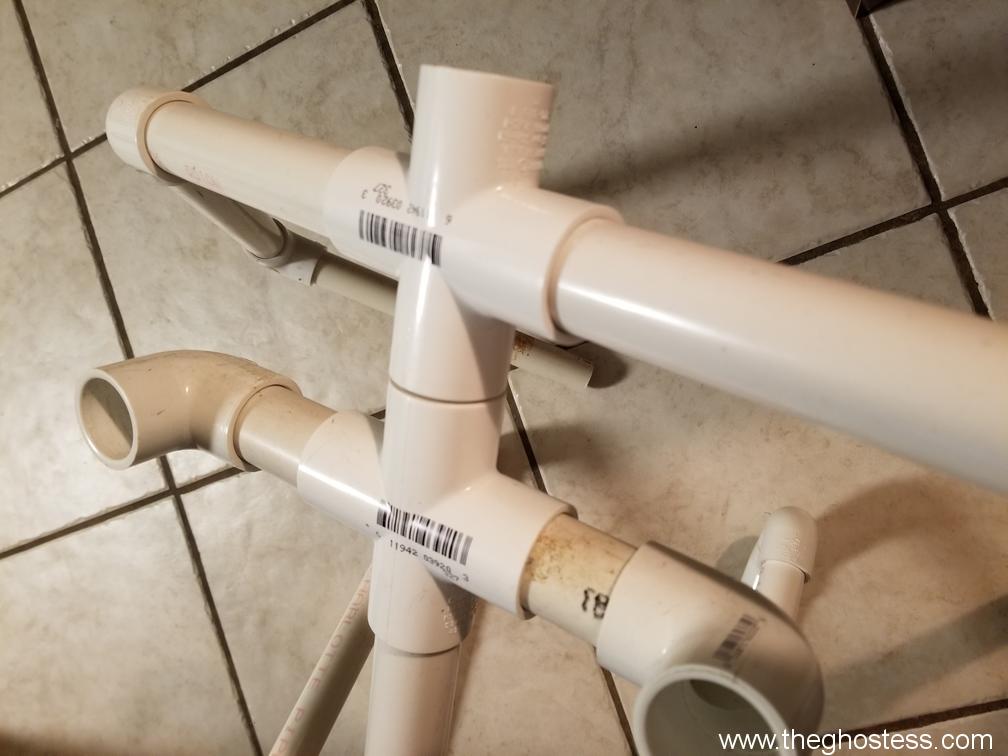
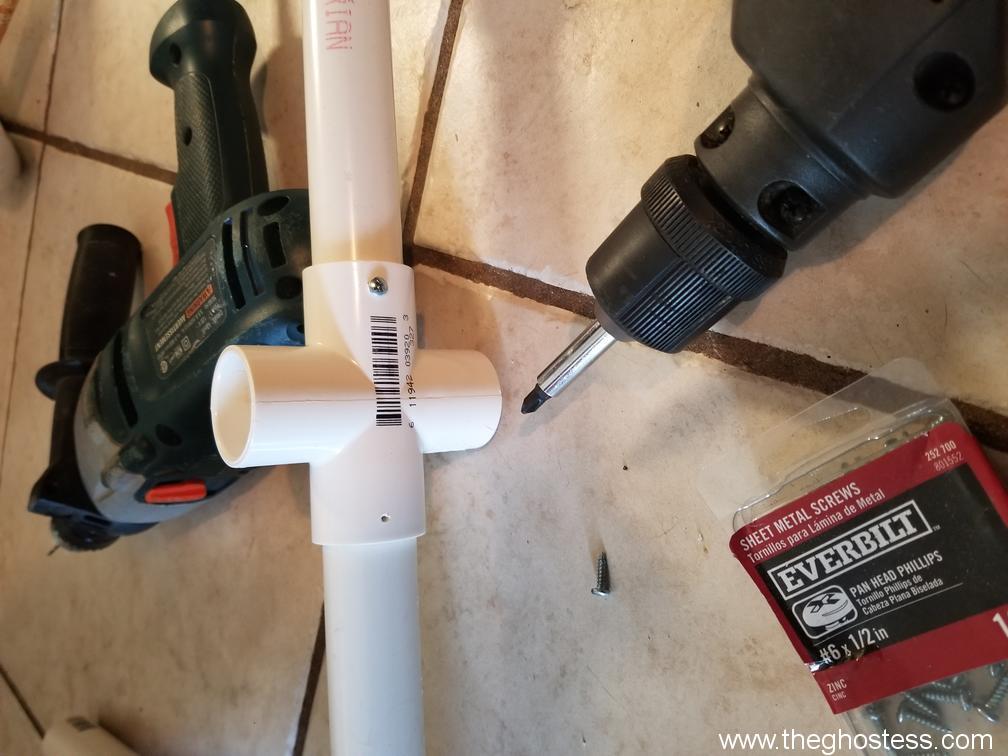
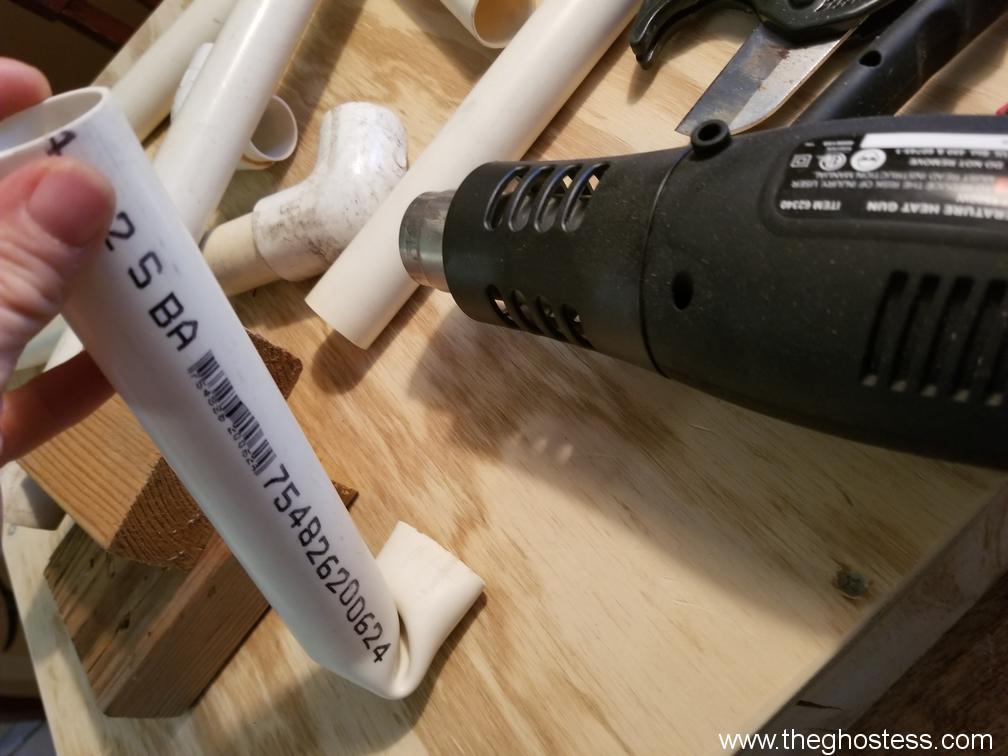
I had to run to Home Depot because, silly me, I thought I had tons of PVC elbows and T connectors, which I do....just not in the size I needed. I needed some cross connectors that were the size I planned to use, so we went and got some. Unfortunately, I forgot that I needed THREE of them and I only bought 2, one for the shoulders/neck/spine and one for the spine/wings. I completely forgot I needed another one for the TAIL! Thankfully, I have several dummy frames in my garage from old props that I disassembled, so I grabbed one from there. This was a challenge, because it was PVC cemented to 3 sections of PVC. Luckily for me, it was thin-walled PVC, and I was able to use my trusty heat gun ($10 bucks from Harbor Freight!) and heated the PVC inside the connector and pried them out with a flat head screwdriver, thus saving myself another trip to Home Depot.
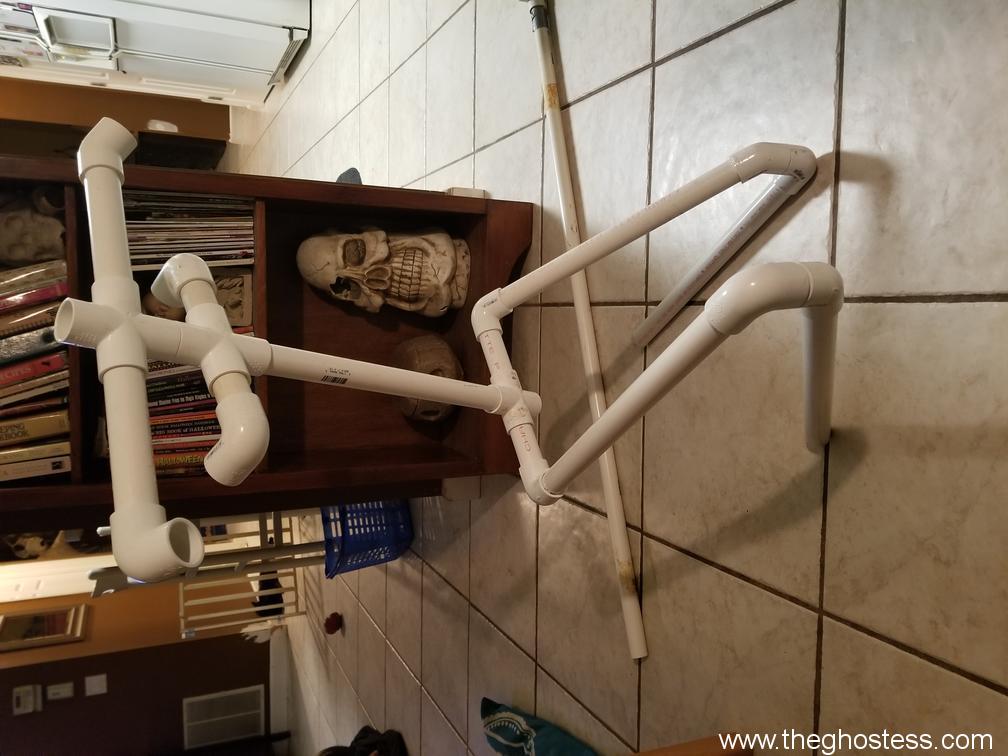
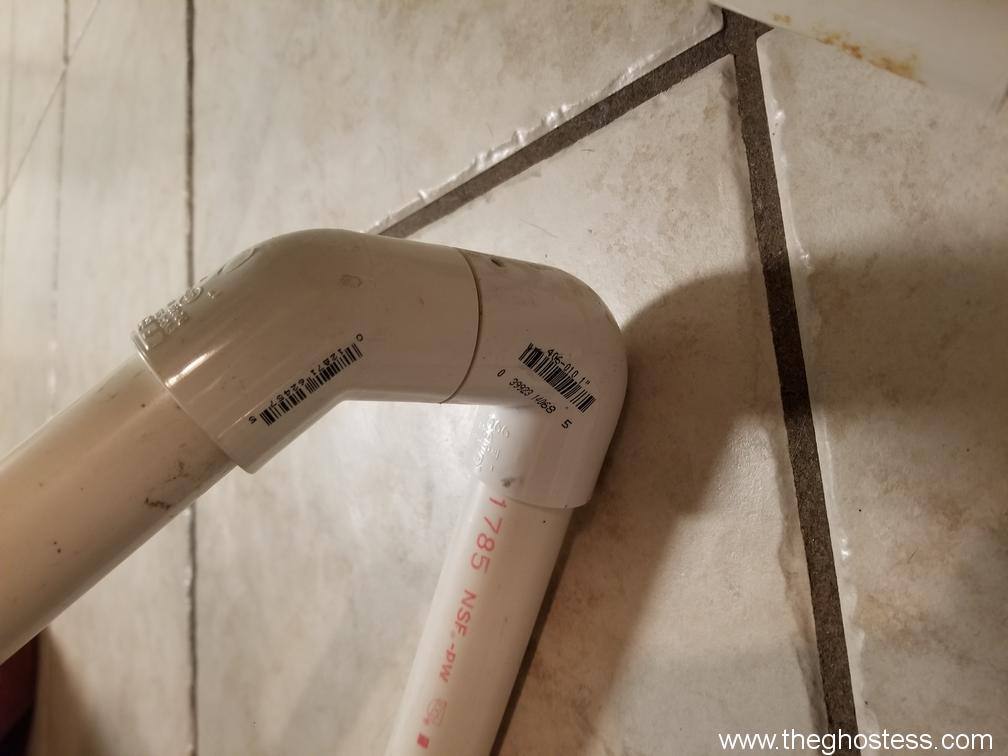
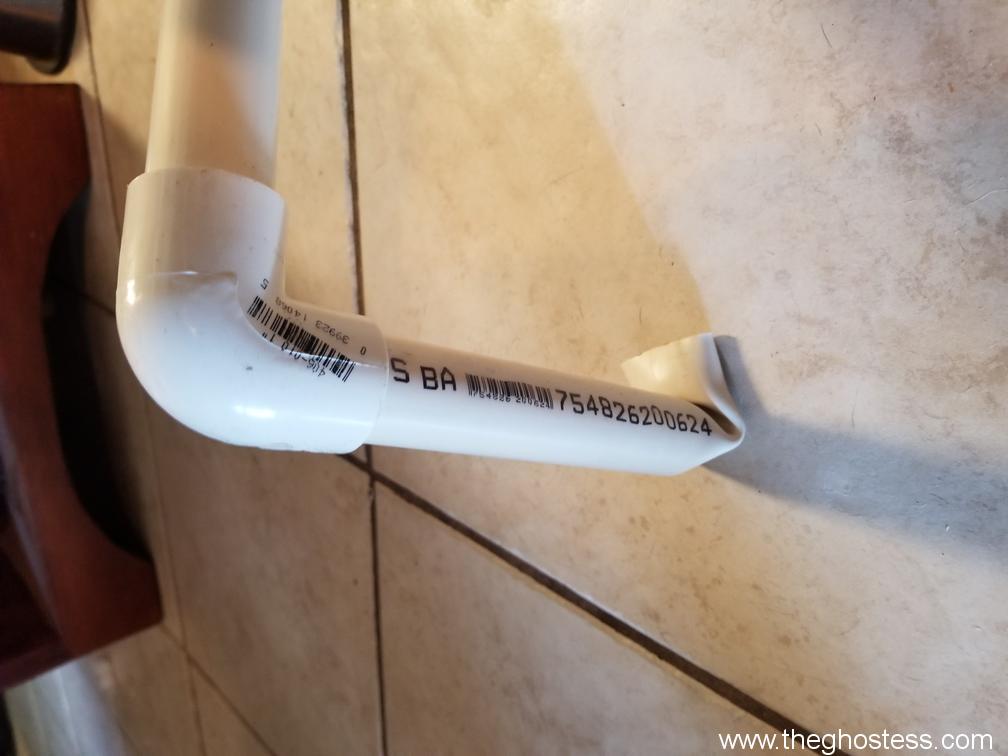
Since I wanted Goliath to look basically like the original version that I made, I wanted him to be crouching, as if he were perched in stone form. I used a 45° elbow connected to a 90° elbow with a short piece of PVC that just fit inside both of them so that they are flush against each other. This allows the knee to be bent at just the right angle for crouching. The first time I made Goliath, I used one 90° elbow on each knee and used the heat gun to bend the PVC, which resulted in a weak area in both legs. I may trade out one of the 45° elbows for a 90° on one of the legs to see how it looks, but for now, this is what I have.

October 10, 2020
O nce I got everything cut and pieced together, I started working on positioning and drilling pilot holes for the small machine screws to hold the joints in place. I could have used another set of hands to do this as some of the joints were pretty loose and kept moving as I was trying to get everything in position. It took me almost 2 hours and a lot of cussing to get this part done. ( Also, I was distracted by Hocus Pocus on the TV.)
October 11, 2020
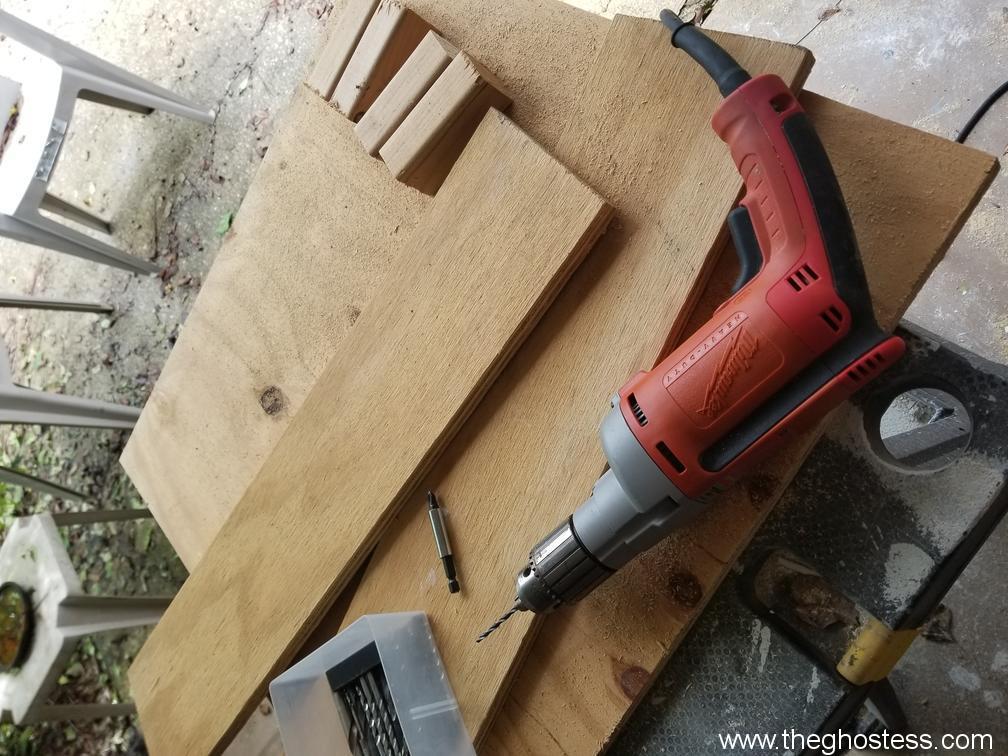
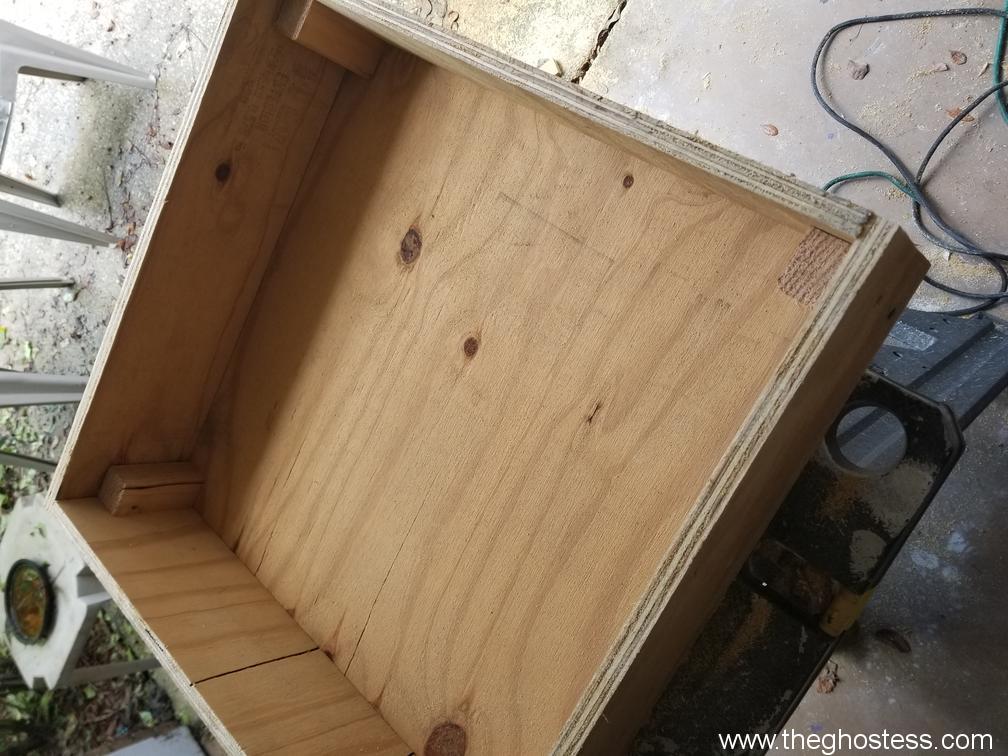
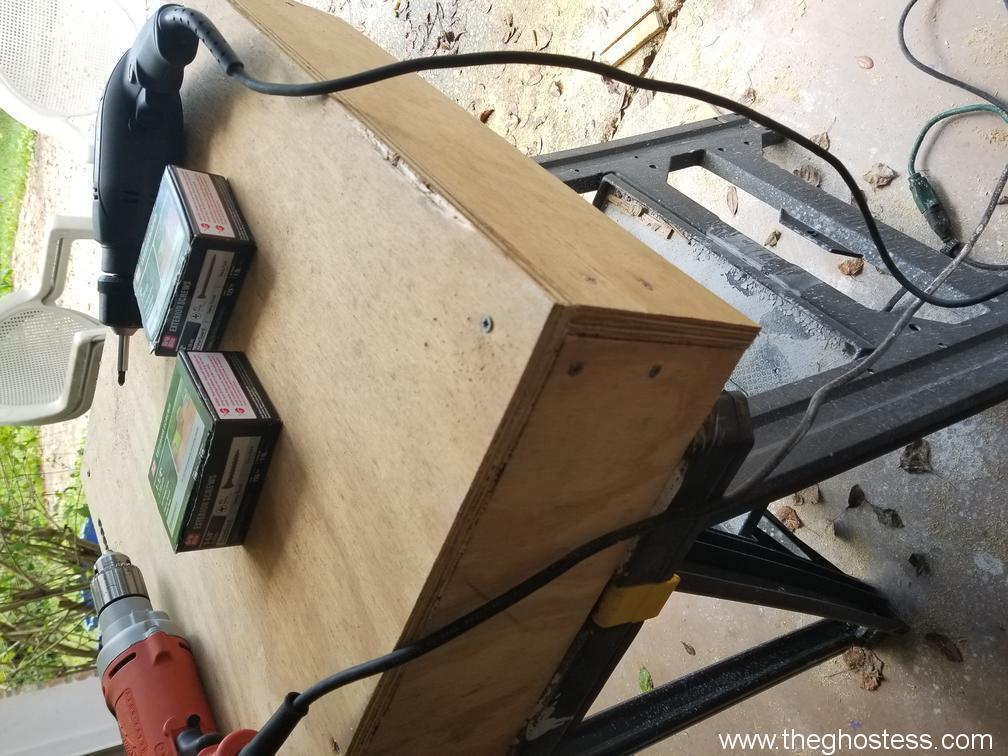
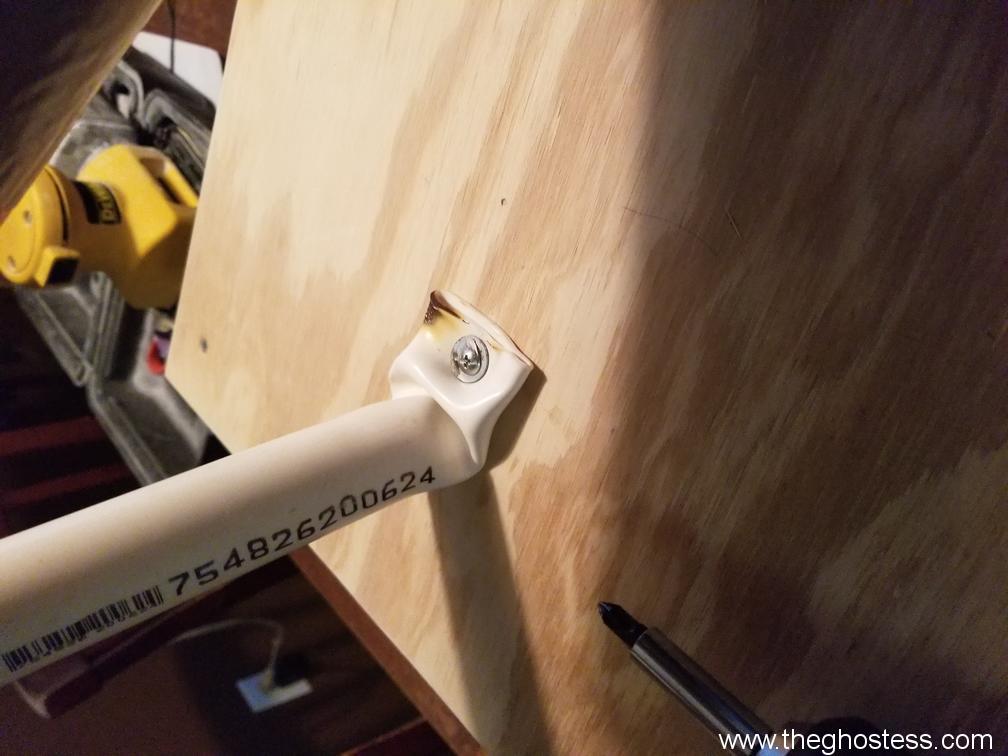
At this point, I'm ready for the base so I can attach the frame and get moving on fleshing it out. I chose to build a 24" x 24" x 6" base out of scrap plywood leftover from my pallet bartop build from 2018's Halloween party. I made it so that I could have it sit on top of a 3-4 foot tall pillar like the last version, only this one will fit over the top instead of inside the top. I wanted it to be in two pieces again, for easier moving. I am NOT a carpenter by any stretch of the imagination, and I know it's supposed to have support pieces running the length of the insides, but I don't think I really need them for this. I can say that it's square! It's definitely an improvement over V.1's base of a cardboard box, which eventually buckled after the Great Rains of 2008. It doesn't have to be pretty or perfect, just better than last time!
Once I got it put together, I gave it a little sanding, because I'm sick of getting splinters in my hands.

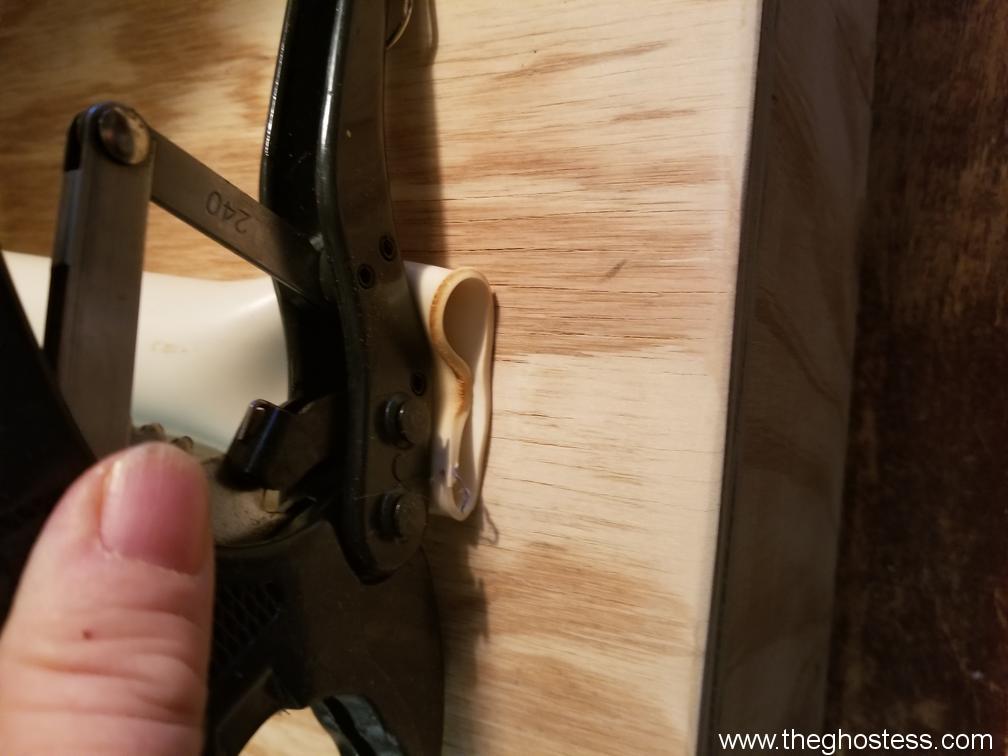
I used my trusty heat gun again to bend the "feet" so that I could flatten them for attaching them to the base and for shape. I also bent the keens a little bit more so they bend the way I need them to. (I also used whatever was within reach to help flatten the PVC, that shit is HOT! Pictured below, I'm using my PVC cutter to hold the heated PVC down while it cools.) Later, I will add another piece of PVC to the straight arm to secure it to the base to help hold his body up better and add some stability.
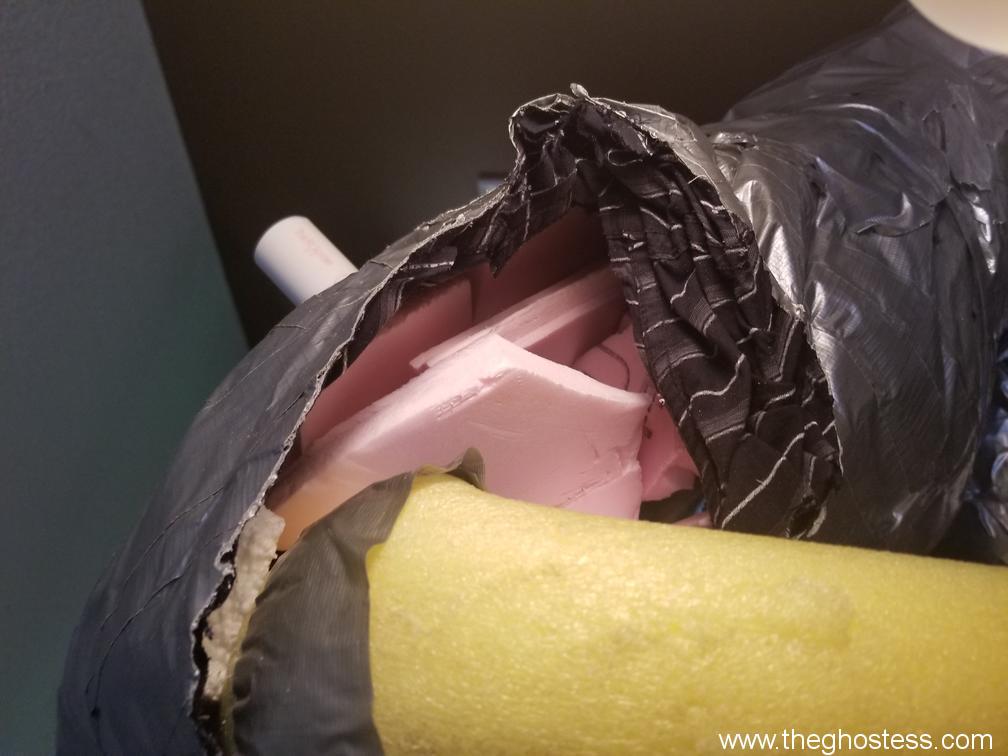
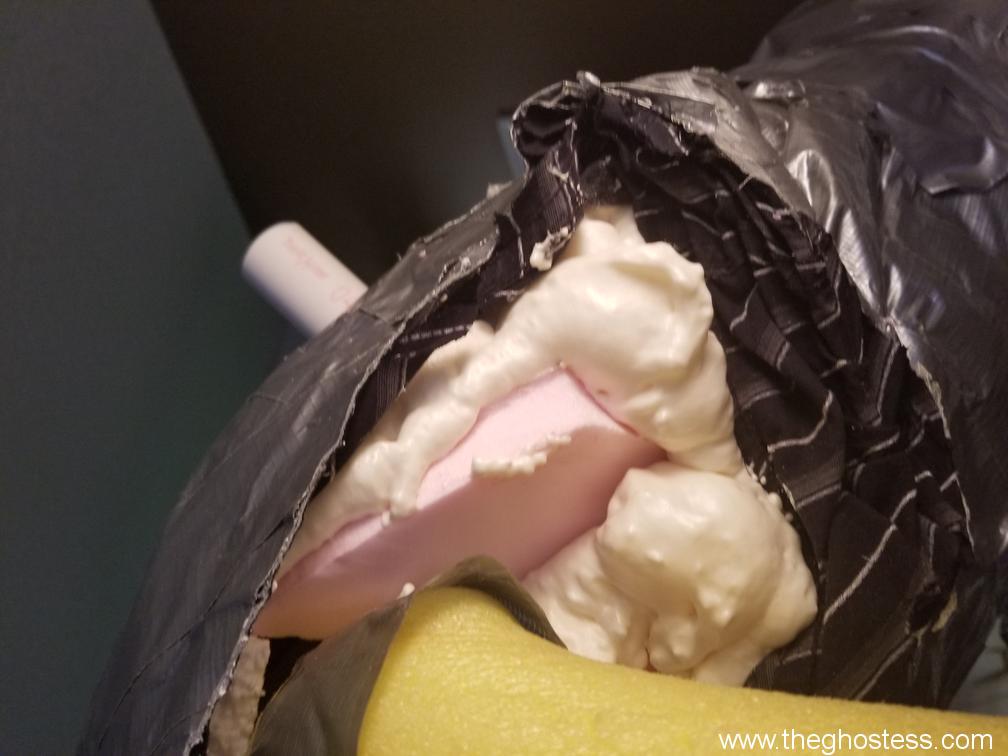
I added the pool noodles I've had in my garage for like 3 years to the legs just for a little bulk before I add the duct tape bottom. Honestly, I think I could skip the duct tape dummy, at least for the bottom... it is a pain in the ass to work with.
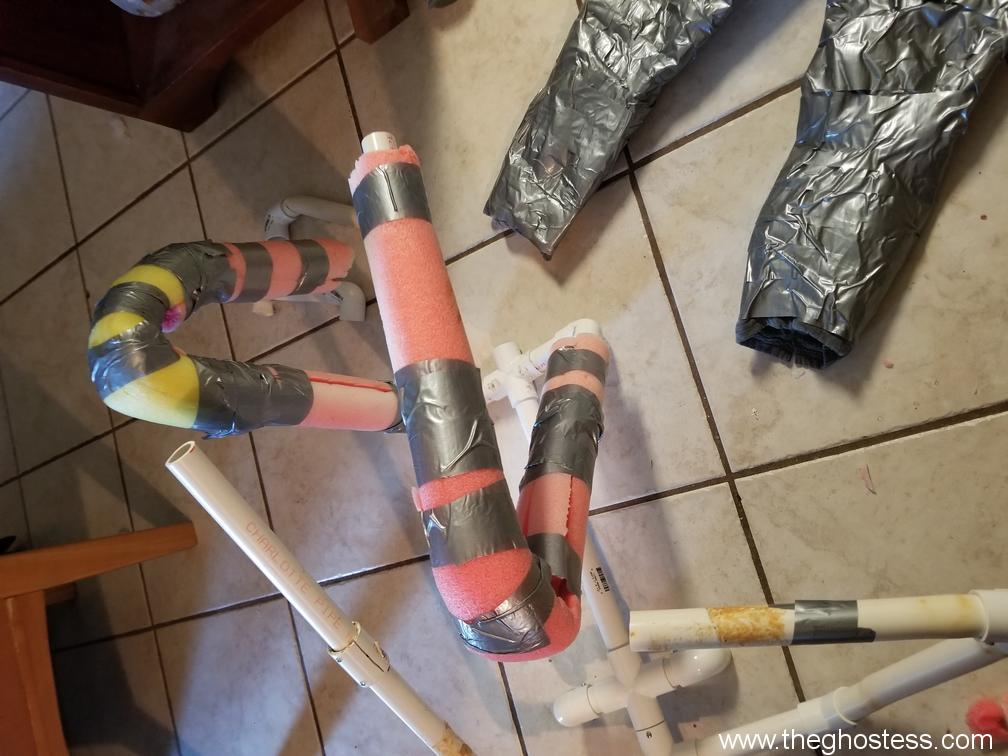
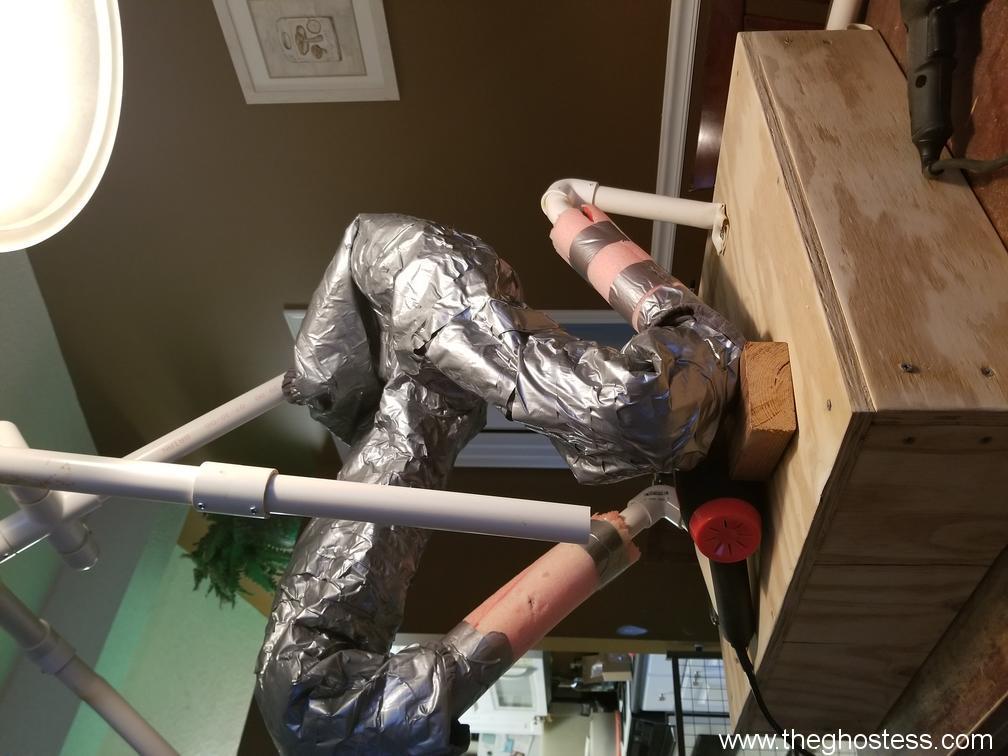
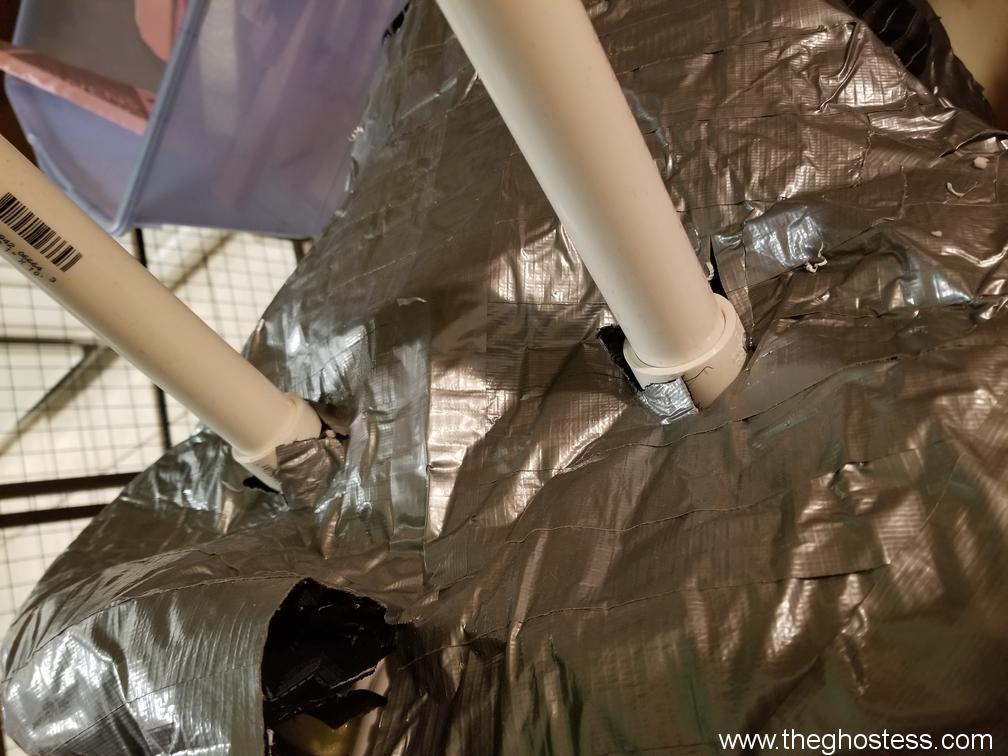
I added more pool noodles to the arms and shoulders, and the last bits I taped to the spine. Then I started adding scrap foam from other projects (I am a hoarder, you never know when a scrap of foam will come in handy!) and started filling out the torso a little. I also attached the PVC elbow and a section of PVC for the tail to attach to.
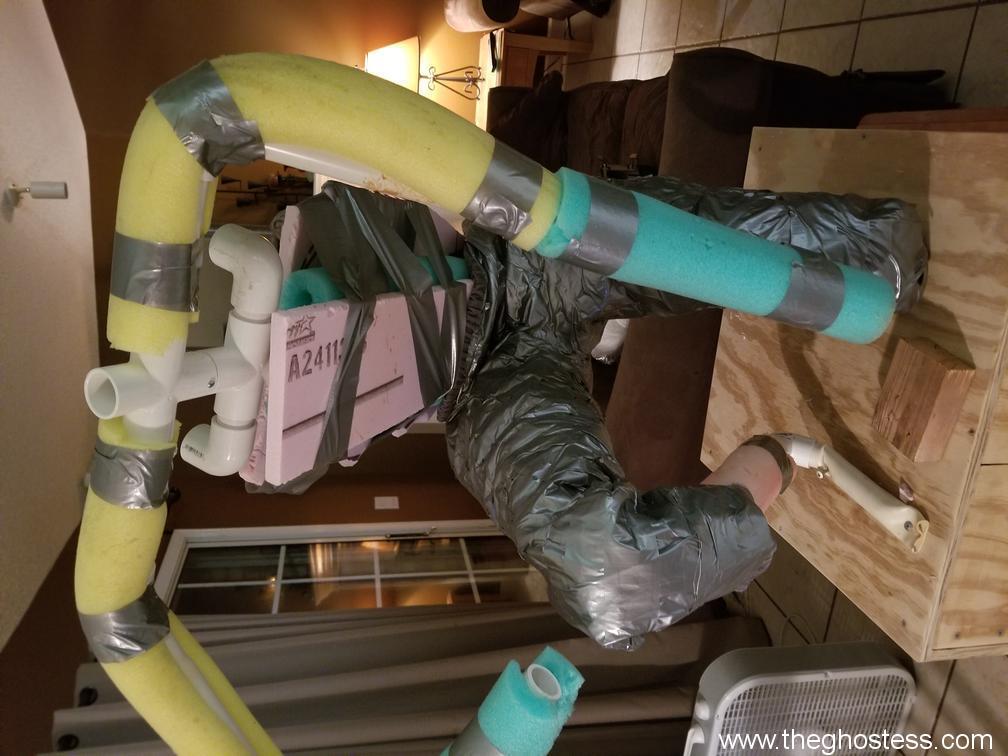
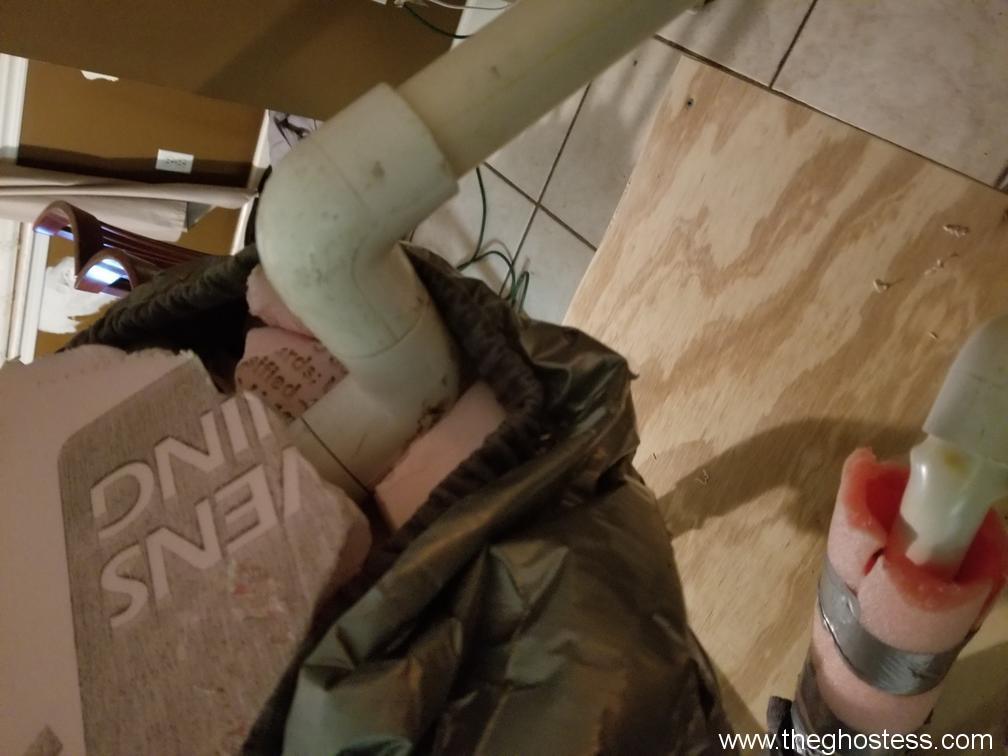
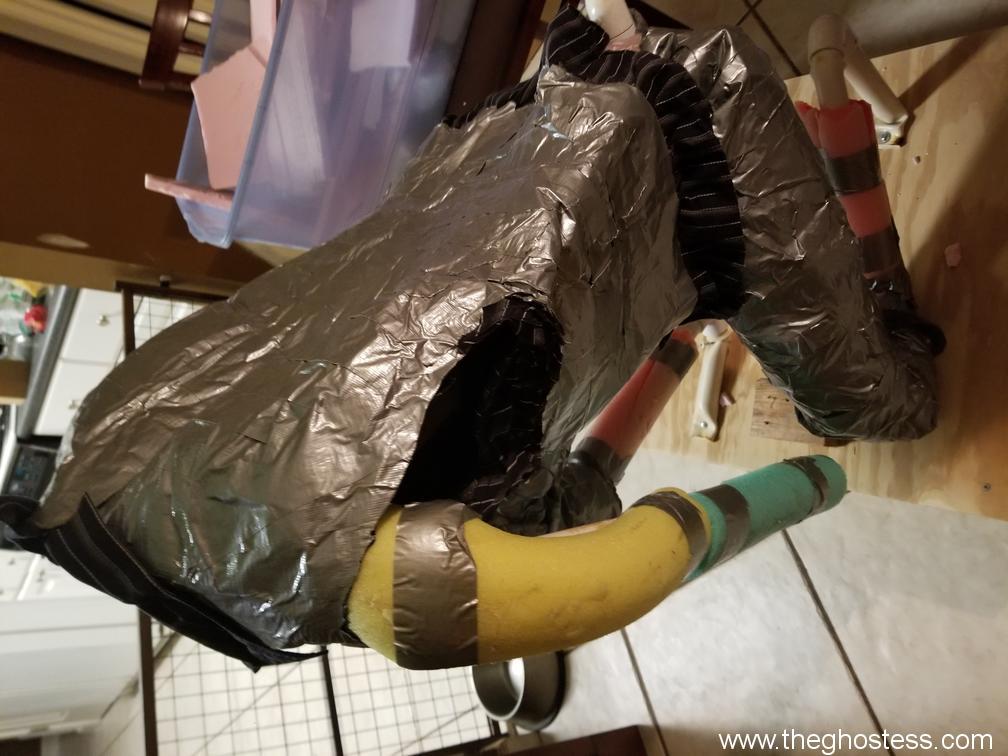
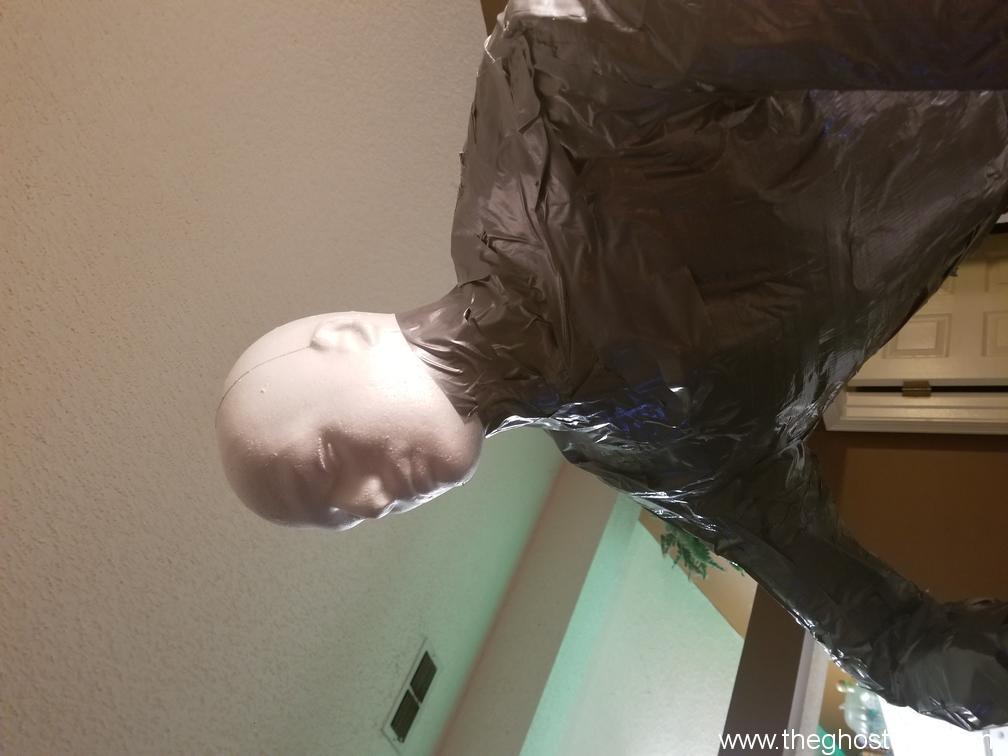
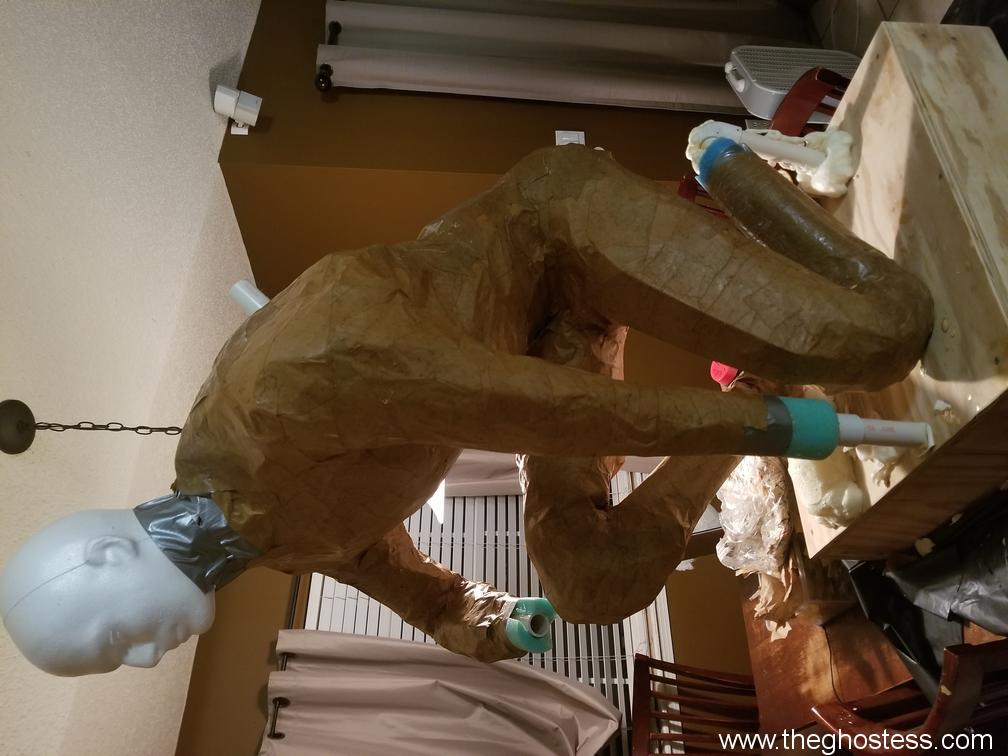
I slipped the duct tape top on after I decided to cut the arms off to make it easier to work with. I made sure to cut holes for the wings to be attached, and secured the pieces of PVC to the elbows before stuffing the torso. I left the PVC a bit longer than I needed so I could build up the back and not have to add more PVC later.
October 13, 2020
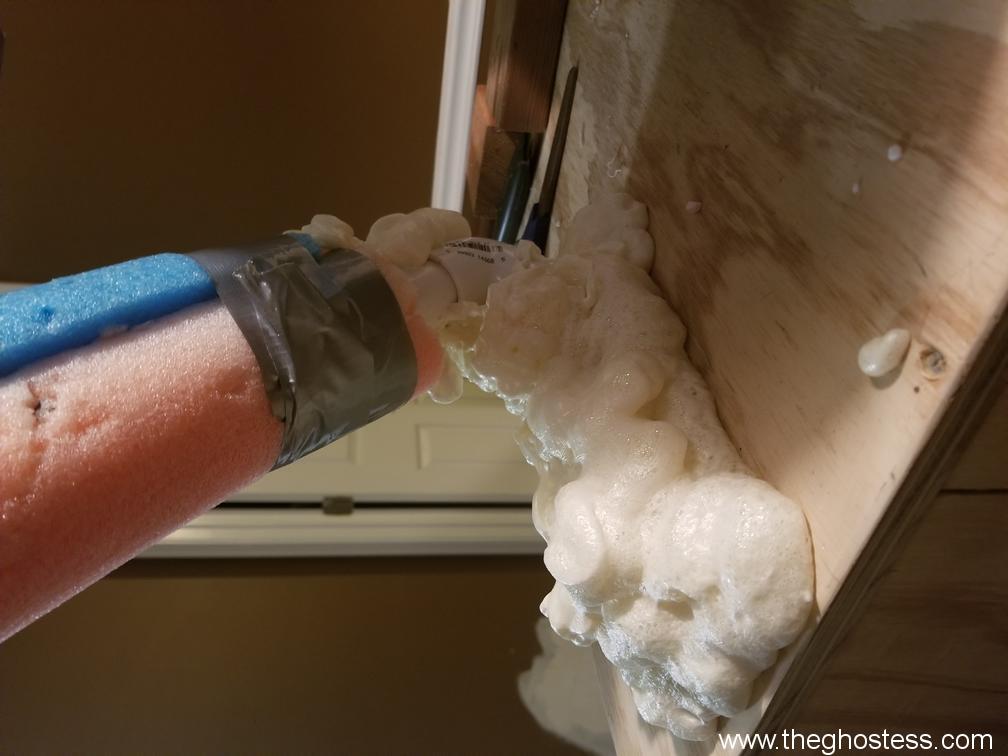
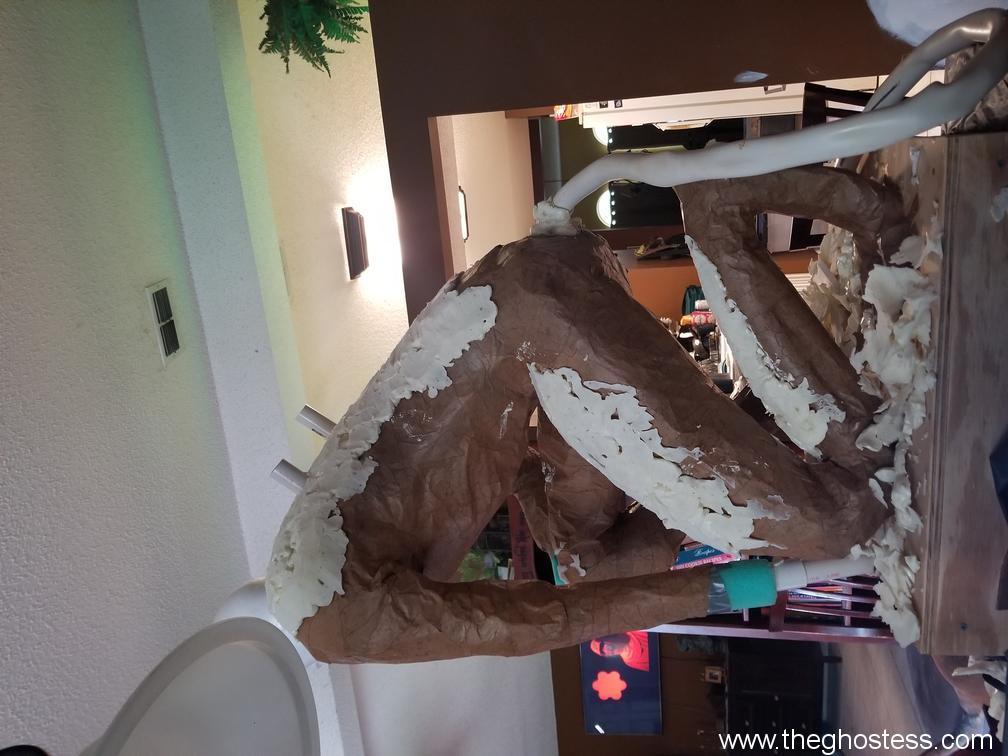
Below, you can see I've been adding scrap bits of foam to fill him out under the duct tape suit. Once I got enough pieces of scraps in there, I grabbed a can of Great Stuff Original spray foam and filled in where there were spaces between and all around inside the torso. I want this body to be as solid as possiblle so that it doesn't buckle with movement when I put the mache on.

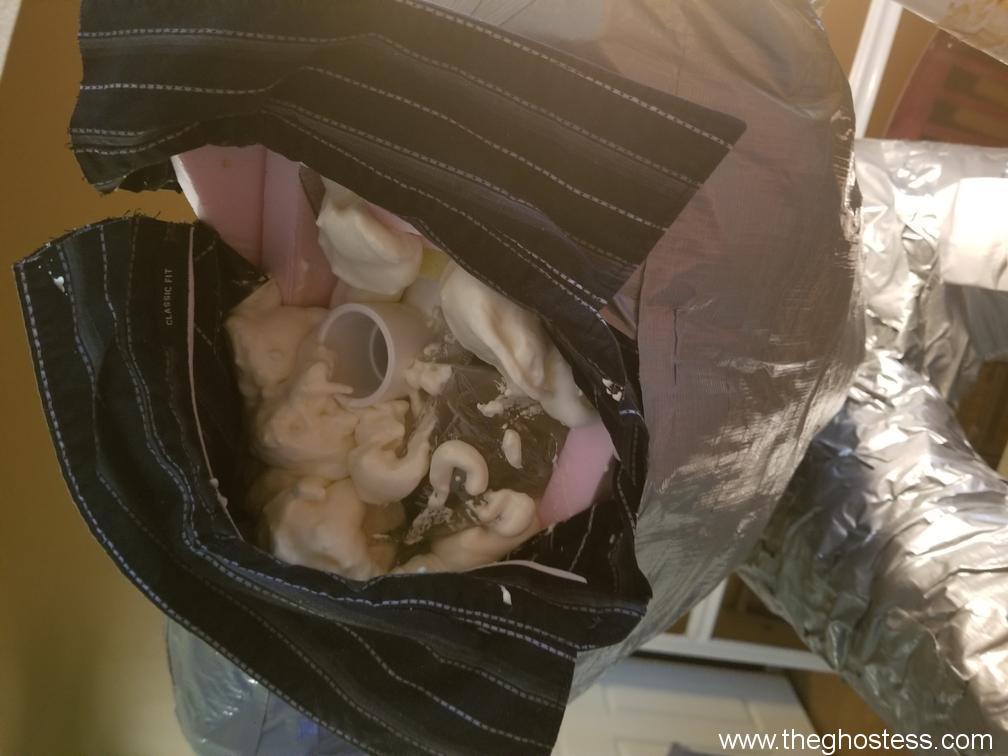
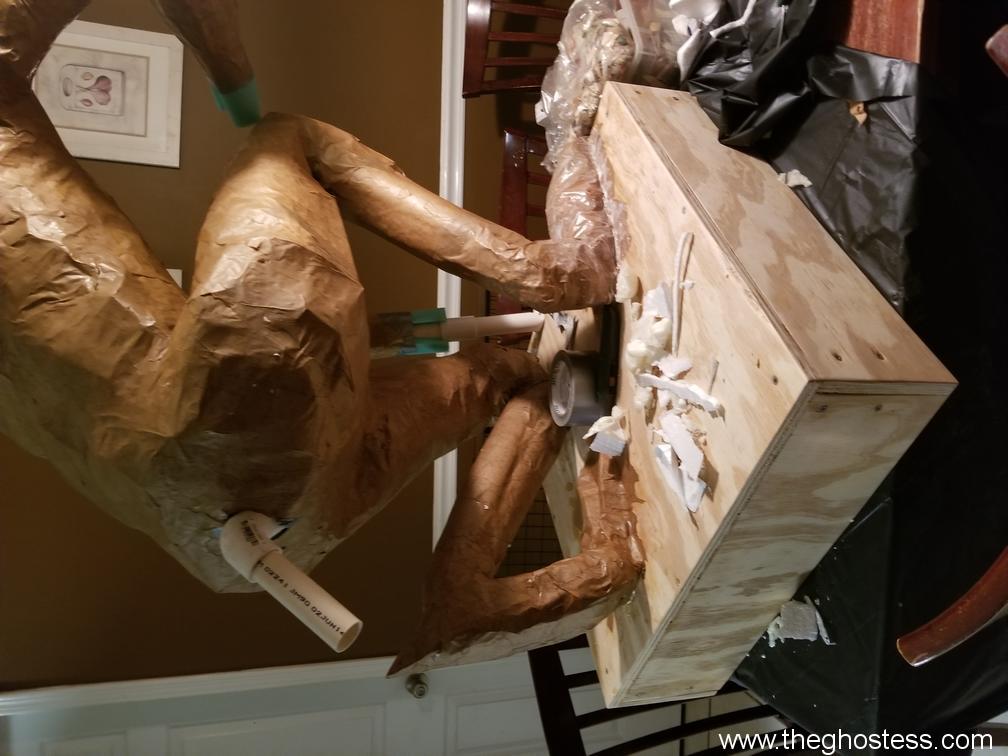
I taped a bunch of pieces of scrap foam to the outside to give the legs more substance before the mache process too. I don't want to have to add tons of bulk filler while trying to mache this guy. Drying times would kill me! I also used some Great Stuff to make a base for the feet, as best I could anyway. His feet will be huge, so I want to make it easier to build them up.
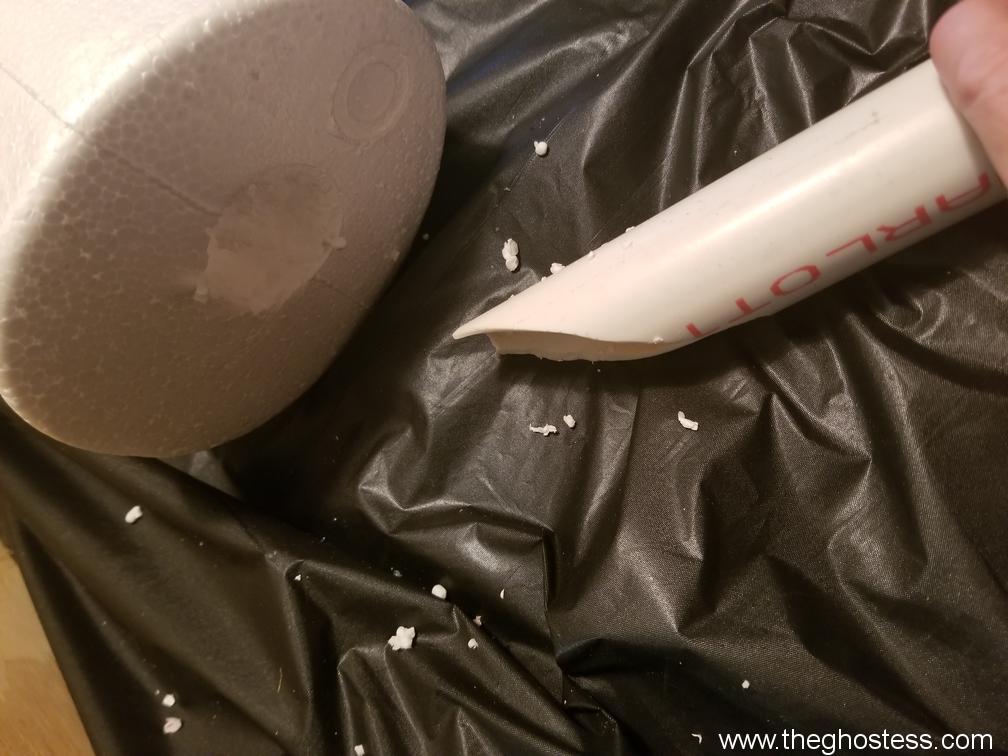
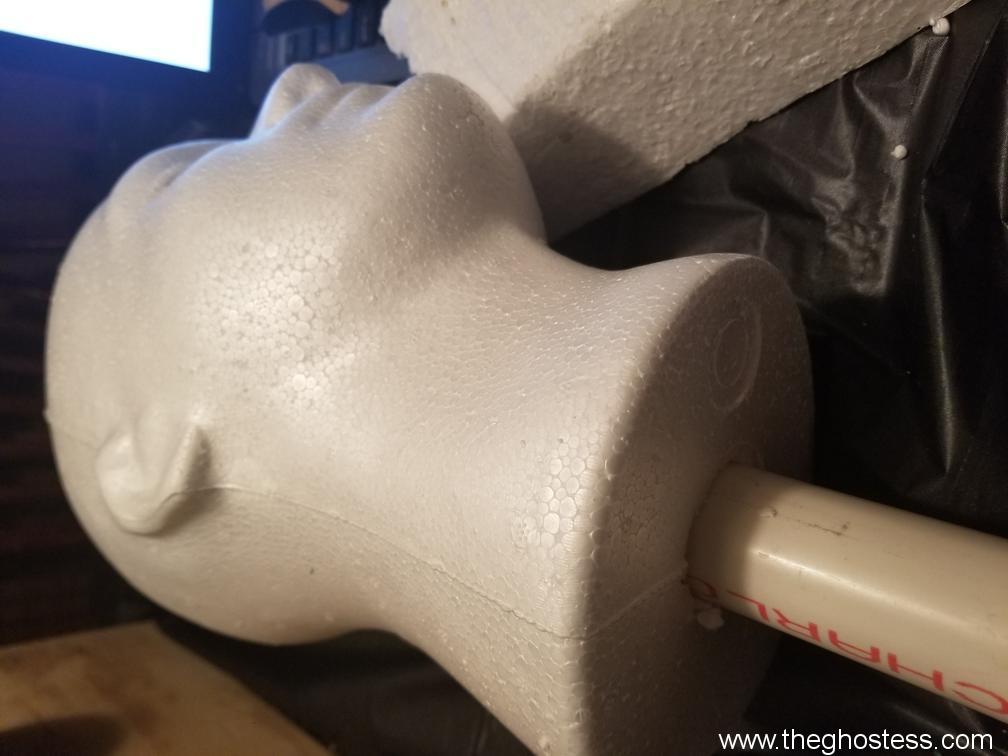
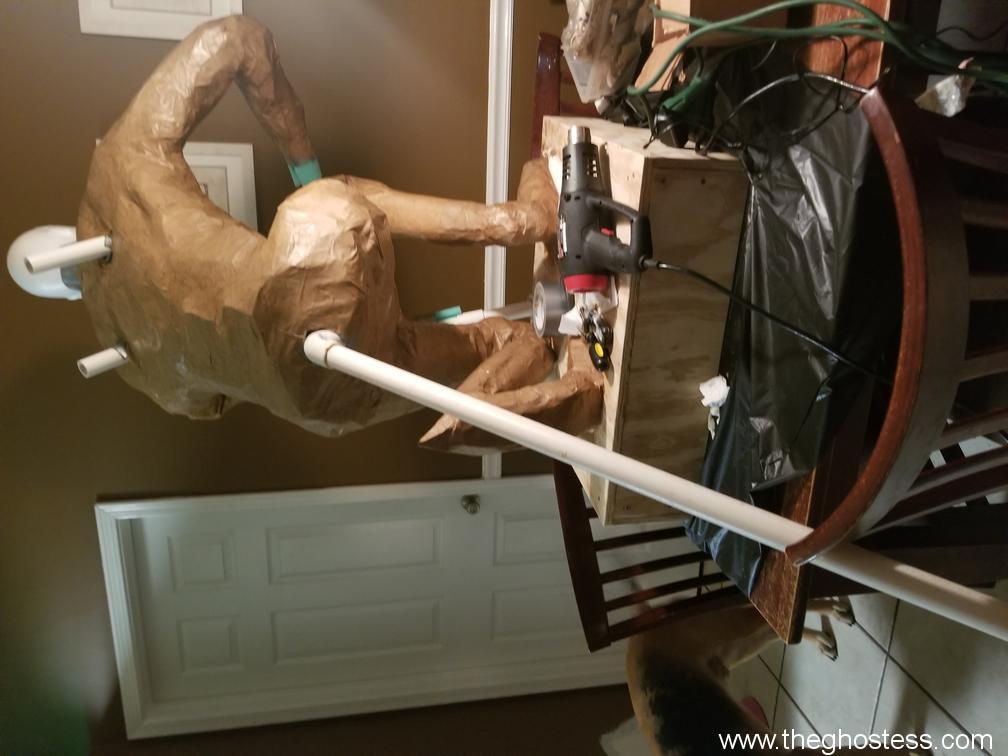
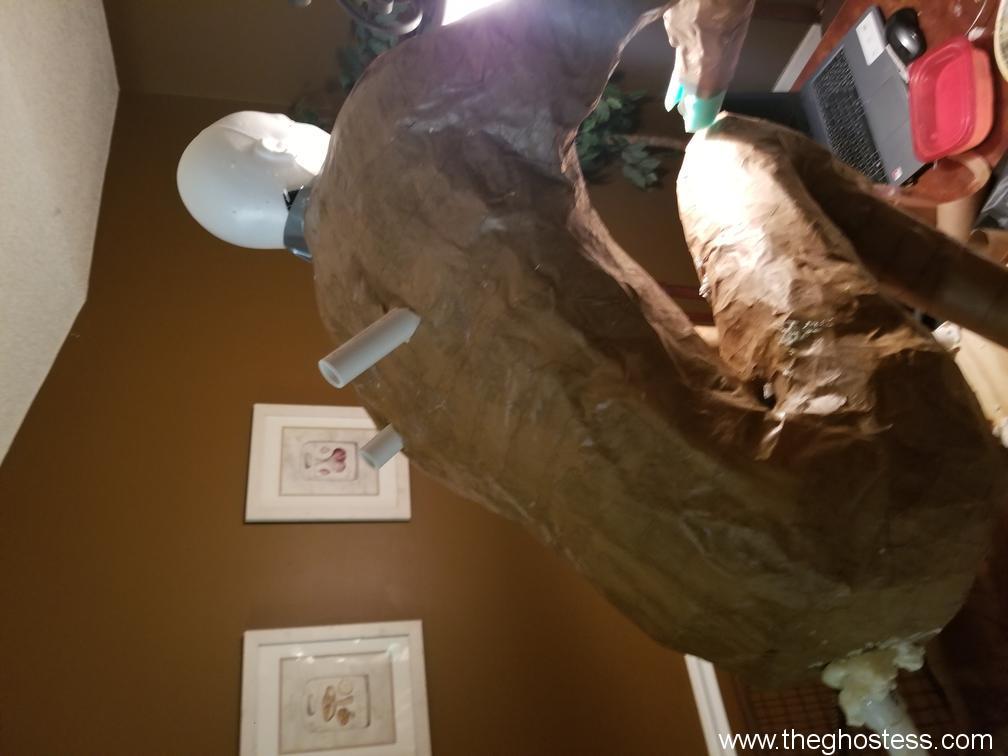
Now I'm ready to attach the head. I bought wig heads off Amazon to use as a base this time, rather than trying to carve one from Great Stuff like I did with V.1. I took a piece of PVC and cut it at an angle, and used that point to bore out the base of the wig form, and then attached it to the body's frame. I used my hot wire foam cutter to shave off some of the rear of the neck on the wig head so that it fits at the angle I want it. Every thing pretty much gets taped up to cover gaps and cracks and gives the papier mache strips something to lay on.
October 14, 2020
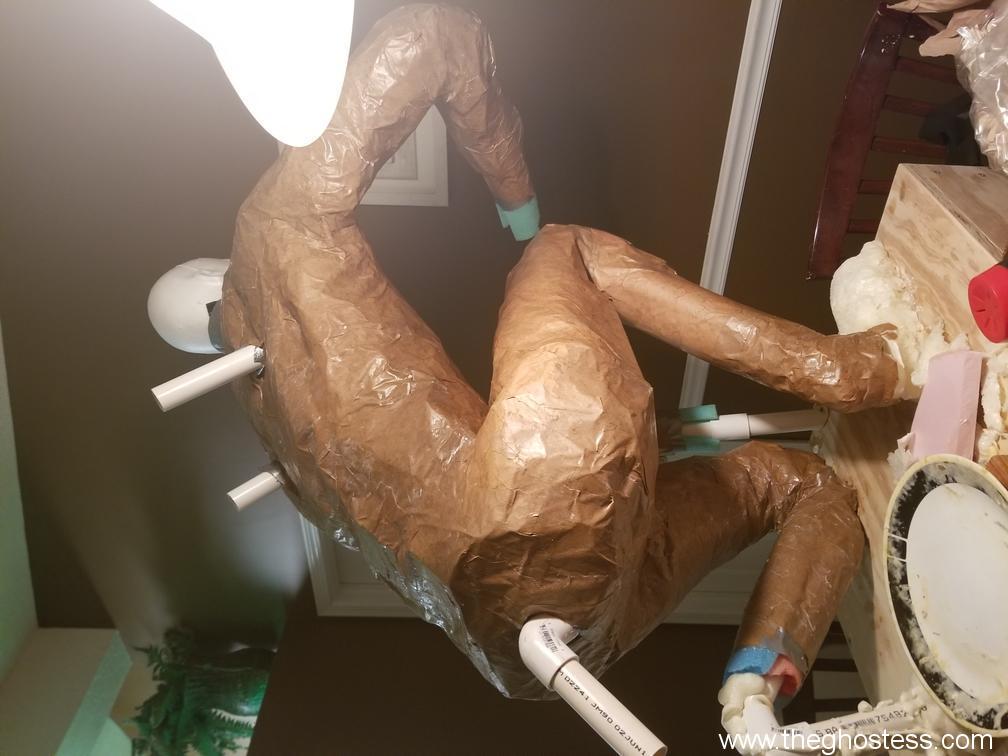
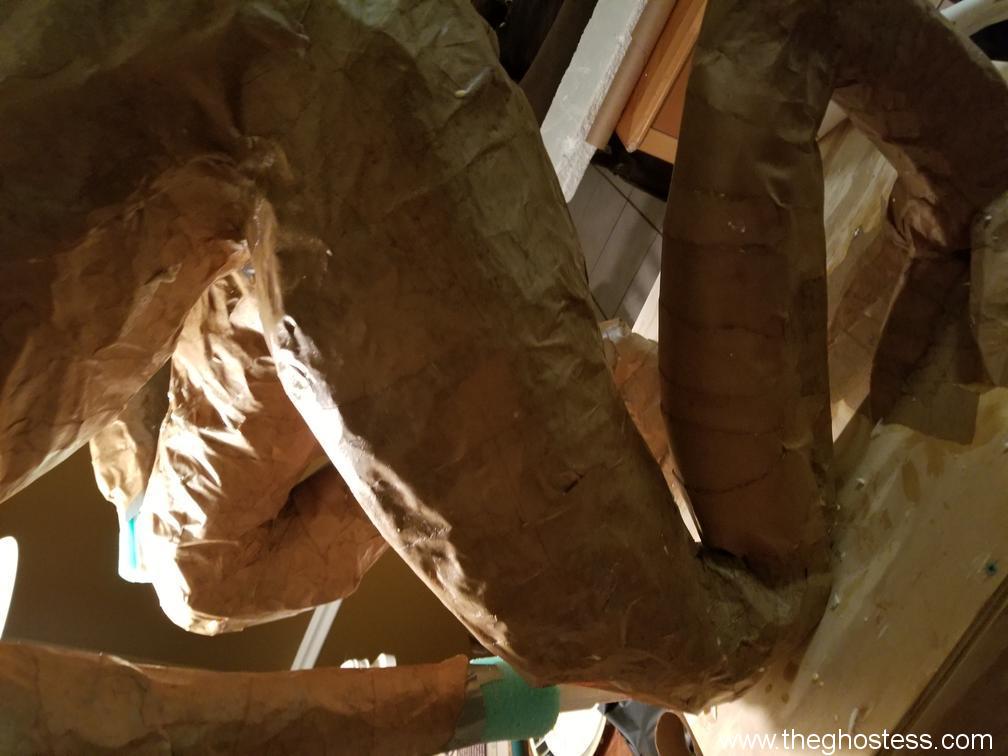
Below, I've put a layer of plain kraft paper mache strips over the duct tape so I can have a smooth surface to work on and see better what I'm working with.
October 15, 2020
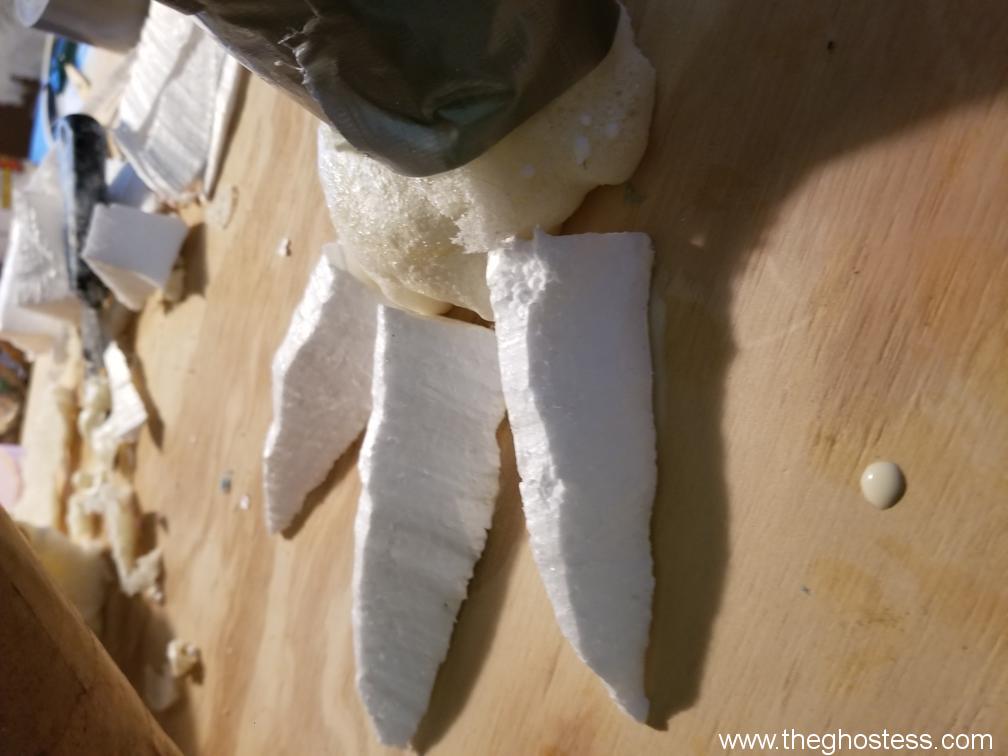
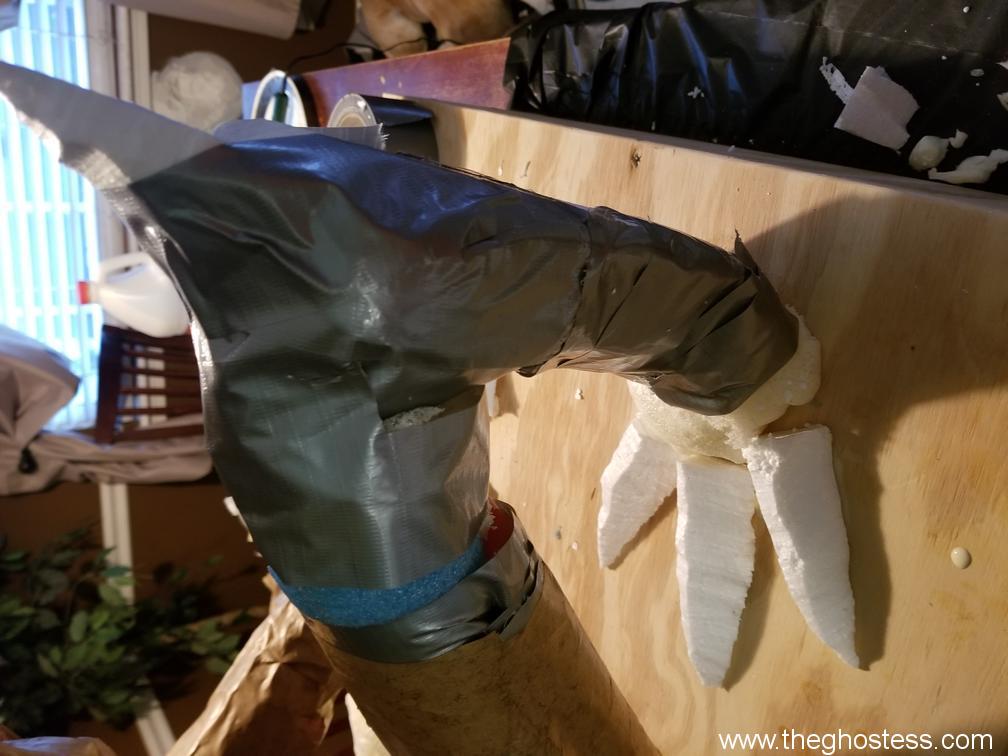
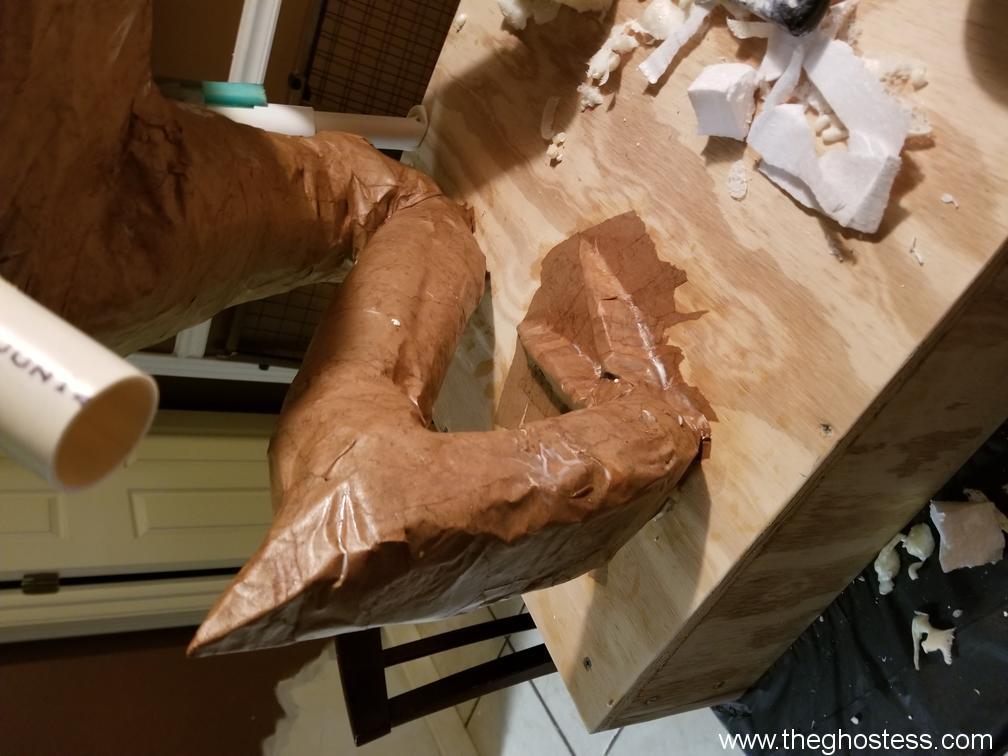
I've also added styrofoam pieces to the feet to make toes and build up the feet. I used a hot wire foam cutter to get the shape, and duct tape and papier mache strips to hold them on. Still a long way to go as far as getting the right shaping and sizing, but it's a good base to work on.
October 16, 2020
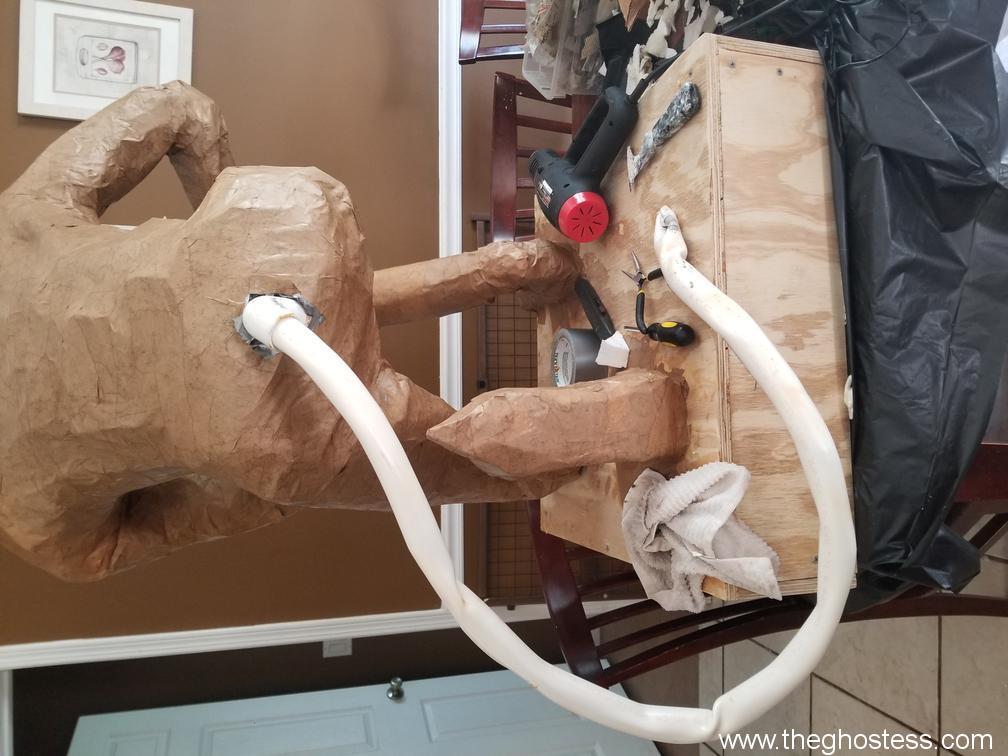
Tonight, I've added a tail. That's it. I took the short piece of PVC out and put a long one in. EXCITING!!
October 17, 2020
This morning, I used the good ol' heat gun and slowly curved the tail. Once I got it in the position I wanted, I flattened the end and screwed it to the base. I started to use the foam cutter to slice pieces of styro to start shaping him, and I thought to myself that Great Stuff might be faster for larget areas like the back. So I emptied a can on him and waited for it to cure.
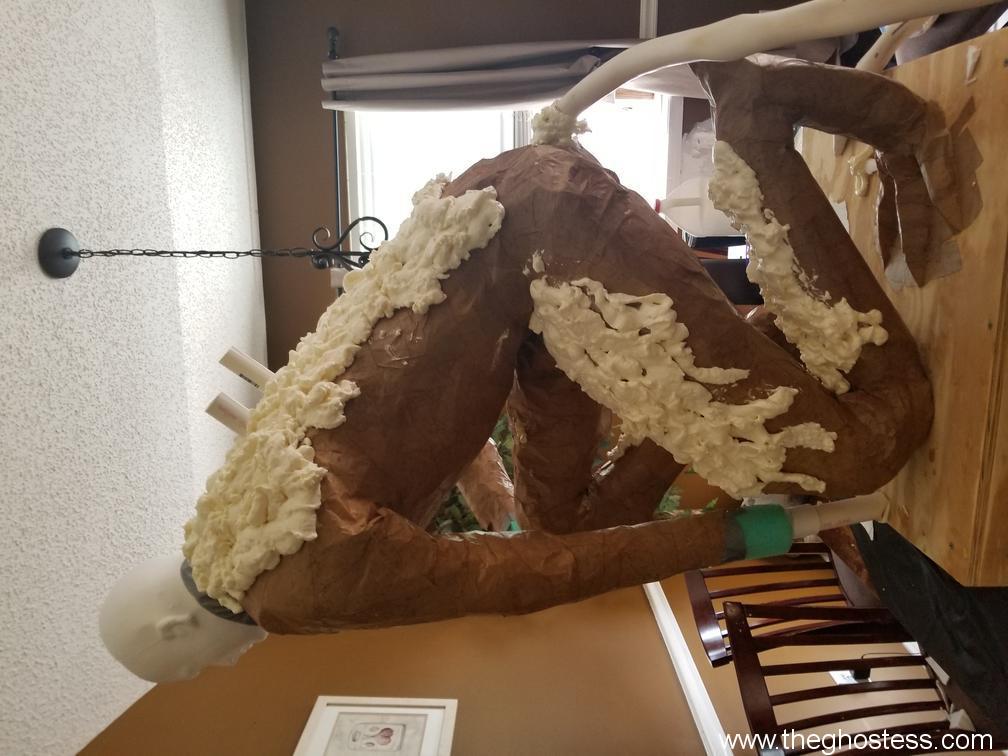
Once the Great Stuff was cured, I used a sharp knife and carved it down to the basic shape I needed. Then I papered over it. It'll take a lot more work to get him shaped properly. I have plenty of material to use after shaving off all the Great Stuff. His shoulders DEFINITELY look a lot better. Why am I not using paperclay to do all this? Short answer - because that shit is HEAVY! Goliath is a big prop, and he is already heavy with the wooden base and thicker PVC this time. Once I get him bulked out with strips and foam, I can give him a good outer shell of paper mache clay and make him look smoother and more natural.

And that is where I'm at currently on Friday, October 17, 2020. I will be updating as I make progress, so check back if you're interested in the process!
More progress on the next page! Click below!
![]()
![]()